Fallen Ocelotepec: Difference between revisions
m (Text replacement - "ð" to "ð") |
|||
| (132 intermediate revisions by 3 users not shown) | |||
| Line 12: | Line 12: | ||
* [[Thaeuss]] - Stephen '''33''' | * [[Thaeuss]] - Stephen '''33''' | ||
* [[Tsayoi]] by Chris c '''73''' | * [[Tsayoi]] by Chris c '''73''' | ||
* | * [[Ophelia]] by Mike O | ||
; Employer | ; Employer | ||
[[Image:BishopOfTrondheim.jpg|left|220px|Gudbrand of Trondheim]] | |||
: The Most Reverend Gudbrand, Bishop of Trondheim O.S.B | : The Most Reverend Gudbrand, Bishop of Trondheim O.S.B | ||
; Mission [[Image:BatGod.jpg|right|80px]] | ; Mission [[Image:BatGod.jpg|right|80px|The Mask of the Bat God]] | ||
: His Excellency would like to hire a worthy party of adventurers to travel across the eastern waters and recover from Ocelotepec the 11 inch x 8 inch mask of the bat god.This is expected to weigh 5 1/4 lbs. He offers 10,000sp and salvage, except for the mask, of course. He can provide 6 whitethorn withes Alchemically hardened into stakes and a small caddy of Marist rosehip tea [[Fallen_Ocelotepec:_the_Bishop%27s_wages| and a few other things]].<br> | : His Excellency would like to hire a worthy party of adventurers to travel across the eastern waters and recover from Ocelotepec the 11 inch x 8 inch mask of the bat god.This is expected to weigh 5 1/4 lbs. He offers 10,000sp and salvage, except for the mask, of course. He can provide 6 whitethorn withes Alchemically hardened into stakes and a small caddy of Marist rosehip tea [[Fallen_Ocelotepec:_the_Bishop%27s_wages| and a few other things]].<br> | ||
:He would prefer to employ at least one conjuror of nethermantic magic and similarly a competent distiller of miraculous brandy. An experienced navigator might be bloody handy, too, depending on how you want to go about things, but he leaves these details to the adventurers, who know best. Also, a Ranger whose terrain specialisation is rain forest or jungle. And an "archaeologist" might be handy, too. But hey, if you believe an Artisan animal husbander and perfumer might be critical to the success of the mission, who is he to demur?<br> | :He would prefer to employ at least one conjuror of nethermantic magic and similarly a competent distiller of miraculous brandy. An experienced navigator might be bloody handy, too, depending on how you want to go about things, but he leaves these details to the adventurers, who know best. Also, a Ranger whose terrain specialisation is rain forest or jungle. And an "archaeologist" might be handy, too. But hey, if you believe an Artisan animal husbander and perfumer might be critical to the success of the mission, who is he to demur?<br> | ||
| Line 26: | Line 27: | ||
Guild Meeting - Meet the Bishop, party introductions and planning, organise some supplies from associates. Also some very warm clothing for the expected cold <br> | Guild Meeting - Meet the Bishop, party introductions and planning, organise some supplies from associates. Also some very warm clothing for the expected cold <br> | ||
We start our travel onwards to [[Nualis|Trondheim]] on the plane of [[Nualis]] with the Bishop. Hold more discussions on-route. <br> | We start our travel onwards to [[Nualis|Trondheim]] on the plane of [[Nualis]] with the Bishop. Hold more discussions on-route. <br> | ||
''We learn that [[Mask of the Bat God]] has the power to bring things to life which is a most sought after item indeed. It isn't known why the item was there or why its been left there until now but now is the time to recover it and bring it safely to the Bishop for safe keeping. We learn that the city of Ocelotopec in a realm known as ''' | ''We learn that [[Mask of the Bat God]] has the power to bring things to life which is a most sought after item indeed. It isn't known why the item was there or why its been left there until now but now is the time to recover it and bring it safely to the Bishop for safe keeping. We learn that the city of Ocelotopec in a realm known as '''Oaxaca''' is also known as the hill of the ocelot (aka Jaguars) and that the creatures are known to be around the target location. The city was once well populated but something happened and the 'people' there now live mainly nearby on a piece of land in the fork of a nearby river. <br>'' | ||
Since we are informed that time is of the essence (or will soon be) we decide to expedite travel across the world to an area of the plane which involves much distance either across land or sea of several thousand miles and many days travel. <br> | Since we are informed that time is of the essence (or will soon be) we decide to expedite travel across the world to an area of the plane which involves much distance either across land or sea of several thousand miles and many days travel. <br> | ||
'''Arrive at Trondheim.''' <br> | |||
We use an '''Ignore Distance potion''' and various magics to enable Tsayoi to walk south from '''Trondheim''' to warmer waters in the south' in a matter of minutes and then swim the ocean through to a jungle peninsula in around an hour. The end of our travels sees us in the area of a jungle where we pause to get our bearings in heavily overgrown rain forest. <br/> | |||
'''Arrive in Central Terranova area''' <br> | |||
We travel a few miles north until we get to the coast where we take carpet and travel SW down the coastline some 400m until we end our days travel. Camp. We become familiar with fruit and the nasty insect life hereabouts. Night passes. <br> | |||
We travel some more and end our travels at a small coastal village (we call this Emerald-by-the Sea) of around 100 families. During the days we'd seen a huge swarm of butterflies (perhaps The Lord of Swarms?) which we chose to hide from. The locals aren't surprised to see people (adventurer types) here and Thaeuss trades some conjured metal items for emeralds. We spend the night in a nearby meadow after a bone circle is established along with a dream locus. '''Night passes'''. <br> | |||
The next day we travel onwards WSW and cross some mountain ranges and end up at our destination which is a valley with 4 'fingers' pointing southwards and which has an abandoned city on a 800m tall hill above a palisaded town at the intersection of 2 valleys. We'll call the high abandoned city ''''Ocelotopec A'''' and the town below '''Ocelotopec B'''' for reference purposes. <br> | |||
[[Image:Ocelotepec_A.jpg|200px|left|Ocelotepec A, south view]] We go for '''Oceolotepec A''' and land to the south on the eastern side before heading in (mostly by foot except for Thaeuss who doesn't care to walk and instead floats on his carpet) to explore the area. <br> | |||
We enter the bounds of the city near the pyramid and we actually cross a boundary between realms which takes 15 seconds to enter but 90 seconds to leave. We hesitantly enter and find a much larger area than we can outside, which may be an effect of the 3 realms connecting here (but hey, I'm no philosopher) or some other effect. We locate and destroy one of the '''substantial undead''' (PoO unknown) and are then engaged by a '''wormskull''' which we manage to beat off while we attempt to flee. The wormskull summons two friends and we are hard pressed to get away until we use the Black King to write a world law (making a gateway into the Astral) and enable us to target one which ends up disintegrated. The other two wormskulls don't harass us while we flee across the boundary. <br/> | |||
We decide to go down to Ocelotopec B and find interesting folk there, a thriving community with a significant number of adventurer types (inc humans, orcs, hobgoblins, blood elves and more) who spend their time going up to Ocelotopec A, looting and then running away with whatever they can. We meet the spokesman for the adventurers <s>Tondrac</s> and we learn the town has a talismonger, a nethermancer, a gnome jeweller/binder, an apothecary and more. We find out that the mercenaries are here by accident and have been for circa 3-5 years after they managed to find their way into Ocelotopec A and thus 'fell through' to Nualis. We spend the day talking and divining what we're allowed to see/touch and then night in the town. We are told to expect scarecrows, mind flayers, liches, elder brains and much more. A bone circle and dream locus are established for future movements. '''Night passes'''.<br> | |||
The next day we go back up to Ocelotopec A and enter from the North of the ruins. There we create another bone circle and then move inwards. We quickly encounter a mist rolling towards us which covers around 2 dozen scarecrows and a nasty rune mage & his imp familiar. The battle was difficult and the rune mage managed to stymie our counter-attack with his nasty spells (Torment is very nasty) and use of his evil magics like hand of glory etc. We finally survived the onslaught and attempted to take down the rune mage but he ported away - much to my disgust - but his head is mine when next we see him. <br> | |||
We next set about looking for loot and ..<br/> | |||
Boris detects catacombs on the cardinal points with the Southern and Eastern being dangerous, the northern 'very dangerous' and the western 'bloody dangerous' and so the northern catacombs become our target. We move through streets, one of which looks mostly intact until inside we note that the walls seem to have been almost clawed away by a being of great strength. We move towards a large pyramidal structure which looks promising but we decide to look around its base for a way into the catacombs/tombs. We find an undisturbed house with a solid door and decide to investigate. A while later we're inside the house (seems to be the catacombs curator's residence - he would appear to have been only 4ft tall or so) once we've got past the insanely trapped (rank 9) door and we search for a way down. Mario settles on the toilet for the privacy aspect involved and successfully locates and disables a horrible explosion trap which then reveals steep stairs going down. We descend the stairs and again avoid another hideous trap to get to the bottom. <br> | |||
At the bottom we start moving through the catacombs when we hear movement behind us - and it doesn't seem friendly. So a wall is raised behind us to protect us and we peer through only to see a swarm (thousands of thousands) of frogs and a dark figure as well. We decide to continue forward into the undead realm rather than face the frogs and master. We suspect The Lord of Swarms again! <br> | |||
'''Into the Catacombs''' <br> | |||
[[Image:MummyThroneMapFragment.JPG|right|200px|Audience Chamber and environs]] | |||
We enter the catacombs proper through sturdy stone doors. We can see a mummy sitting on a central throne in the cavern (some 800ft across) and are then assailed by paired-wraiths. We start to make way and our lessor known front-line binder makes his presence felt in a forking fine way. I with my Holy Sword and Mario with his various weapons combine to take out the wraiths at a pace before they resort to lashing us with damage spells. The enemy are closing... | |||
<br/> | |||
'''Still in the darkness of death rooms''' <br> | |||
We through concerted action take down the wraiths until only the mummy and her 2 lieutenants remain. Mario has competition when the drake appears and comes to our aid (or rather us to his once he fails to resist her charms) somewhat. The remaining enemy have caused a celestial barrier around them and we are hard pressed to enter. Boris does but becomes enamoured of the mummy and starts gifting her his precious items. We see this and attempt to aid him (or rather to destroy her) and through powerful magic we take down the barrier and despatch them all. She isn't completely dead and so we track her fleeing soul and destroy what we can. We then take stock and loot the area (including canopic jars) before looking to flee elsewhere - perhaps the surface away from the mind flayers nearby. We go back to previously passed rooms and search for an exit. We find a doorway made from a Lurker (an elder creature who has no concept of 'death') who offers to allow us passage down...<br/> | |||
'''Try to find a way out of this nasty place''' <br> | |||
We searched for alternate ways out of the complex that didn't involve Mind Flayers, a swarm of frogs or a suspect lurker portal. We discussed this with our new companion and he recommended we leave the way he entered and so we went back through the big chamber to an alternate egress and departed the catacombs - avoiding the mudslide and rickety wooden area. We did manage to locate some expensive gems on our way out. | |||
On the way, out we detected an entity called 'The Committee' which is a collection of 7 'minds' attached to a single entity - we choose to avoid this entity. <br> | |||
We exited in an area with little houses and a whole lot of devastation. We discern we're on a plane named Haven and we're concerned. We examine an area of 9 houses which had been destroyed by very intense fire. After investigation, we discover that the Dragon '''Charcolgrin''' had destroyed the homes as they contained crystal entities which are a type of horror. We also find a scale of Chalcolgrin and determine his POO is Haven and he's an Elemental Dragon, around some 70ft in length. We further investigate nearby and determine Chalcolgrin and the Black man aka Buwalgatha (a named horror) fought a battle nearby which changed Chalcolgrin from being a multicoloured (red/green/blue) spined dragon to being one with blackened scales. | |||
We choose not to dilly-dally and apart from a cursory look at an Adoratorium we depart to the east and exit the strange area, heading down to lower Ocelotopec of Ocelotopec A. <br> | |||
We discover that it's still the afternoon of the day we left (the 12th), however the eclipse is now only 10 days away.<br> | |||
We go and see the locals to find out information. We see Avenging Claw and discover that the Rune mage we encountered is no other than '''Blackrod''' and he appears to add Greater Summoner to his list of abilities. We also buy some new good from AC, namely a desperate charm for Tsayoi, a 'Horror Fend' for Mario, 3 'Death Cheat' for Tsayoi and 2 'Absorb Blows' for Tsayoi. These seem the items that we'd likely need in a pinch. We also ensure we're disease free before retiring for the night. '''Night passes'''. <br> | |||
The next day we go back up and enter Upper Ocelotopec or Ocelotopec B at the point we exited yesterday. We go to the Adoratorium and go to quickly check it out when we discover that it is a dark sphere which has been peeled back from the inside. We do an experiment and using a Rag and String Golem to see where the center of the sphere is hoping to find out where it goes. The Golem gets possessed by a spirit named Kerastes and so Mario binds his will to control him. We still wonder how to get at the center of the sphere .... <br/> | |||
'''A dangerous encounter''' <br> | |||
We look around a bit longer but decide that its a bit dangerous here so we decide to move on and head south to where we consider the mask and more to be located. 'Before we do we go north to check out the magical bricks but they're covered in goop and hard to locate without significant damage to us! We investigate the Southern Temple and its 'god house' and loot some items there and then take them outside to divine them. We then partake in some lunch and after divying up the items we enter once more. We go to the other southern structure and discover several substantial undead (giant sized Nephalim) which we engage and manage to defeat with a whole lot of trouble. <br/> | |||
'''We search, encounter a Beholder and plan to kill some Ithilids''' <br> | |||
We search, loot and then Boris animates the three bodies as they might be helpful. We look above and discover a beholder on the next level with its eyes out on the approach vectors which means serious issues/death for us so we plan to be cunning. Eventually we come up with a plan which involves making a small hole into its 'lair' and then stuff some magical material into its mouth unexpectedly which turns it into an egg which we catch. The plan works flawlessly and we find ourselves possessing a beholder egg - which we decide would be the ideal present for the Ithilids nearby. <br> | |||
So we return via the curates lodgings down to the mummy's catacombs where we espy the Ithilids on purpose. We discover that the Ithilids are in fact upon one of their ships transiting the void and that the fulcrum between the planes is upon it - most unusual. We also note the presence of 4 'torpedo' rooms containing 15 frozen '[[Aliens]]' which we hatch a plan to use to destroy their Ithilid captors. Using our magic we break down the ice around the aliens and then cast mind counter-spells upon them to make them resist the Ithilid control magic. We do this successfully for the 2 forward torpedo rooms but when we try to repeat the trick at the rear room the Ithilids are ready and initiate counter boarding measures. They (6 of them) are counter-boarding us and things are about to get interesting. <br/> | |||
'''We battle the Ithilids, meet Daisy, rest and go bat shit''' <br> | |||
So, battle was joined with the Mind Flayers. We managed to kill them all except one who fled back to the safety of his ship. We decided not to follow once we saw flames in the room below and we suspected the Balrog had got loose and that the Ithilids might be preoccupied - muwahaha! It couldn't happen to a nicer bunch of squid faces! <br> | |||
Anyway, we noticed a newcomer near us who had been aiding us during the fight. We introduced ourselves and met an elven mind mage named 'Daisy' who was keen to join us and get out of here. Together we departed the ruins, did divinations and then descended into Ocelotopec B where we undertook trading of loot (killed the Beholder and sold the parts), got a bonus SD grenado , purchasing gems (''we sold off 16,075sp in the low value gems we already had and bought the following 2 Emeralds of 3,000sp and one of 5,000sp, a large Onyx 6,000sp, a diamond 4,000sp and a ruby 7,000sp - a total of 28,000sp less our trade-ins!'') and rested the night. '''Night passes'''.<br> | |||
We go back up to the ruins in the morning, enter from the SE and go to the lower room on the pyramid we'd been looking around and which had bats in it as we considered that the bat god mask might be there. Its full of bat shit and we have to destroy a whole big enough to crawl through to gain entry. Once Boris is in, I'm almost through and the rest of party lined up to come in when the bats mobilise...<br/> | |||
'''Battle of the bats and an important release''' <br> | |||
We battle the huge bat and the multitude of small bats and finally manage to destroy her which turns out for teh best as she was a captive bat goddess Itzpapalotl (aka Obsidian Butterfly) who had been bound here by an enemy and who could only be freed through death. She was grateful and she rewards us with lessor wishes and tells us where to locate the Mask of the Bat God. It's not in a good place and is in fact in a nexus of planes. We decide to go get it and set off down into the mummy area again. We come across 'the Committee' and a battle ensues but we prevail and looting occurs. We plan continue onwards towards the nexus area. | |||
'''Horror Annihilation - encounter Queenie and a Grey Slaad and then a lucky encounter with Blackrod'''<br> | |||
We spend time annihilating the horror that is the Committee and then move inwards. We go through areas of darkness and find areas laced with trips made by Blackrod and his minions. We find a trap/ambush room occupied by the Incubus and Succubus but we turn the tables on them and anti-ambush them killing both (for now) and we loot and move on. <br> | |||
A little further in we come across a horde of frogs and we decide on a strategic retreat elsewhere in the complex away from there. Things go from bad to worse when I glance into the void and see a [[Grey Slaad]] (the epicentre of the frog swarms) and [[Queen Xiombarg]] coming towards us and I'm physically impacted (in a bad way), so at half speed. Strategic retreat turns to fleeing by carpet and we expeditiously travel down the corridors with the sounds of Queenie and the Slug following us. <br> | |||
In our flight we come across Blackrod from behind who seems to also be fleeing Queenie and the Slug and we quickly despatch him but allow his minion to flee in exchange for information and his itemry being left behind. <br> | |||
We get to the mudslide and get up there quickly followed and through great use of magic we relieve Queenie of her sword and get up to the little boxes area from where we activate the bone circle to move quickly to the north and then out of the magical barrier - around noon.<br/> | |||
'''Back to Safety and then Blackrod comes seeking revenge''' <br> | |||
We spend 2 hours until 2pm resting and dropping off material with Poppy/Daisy and then we head back up the hill towards the ruins, even if Tsayoi isn't fully recovered and with Poppy/Daisy who needs a rest it seems. <br> | |||
Half way up the hill we encounter Blackrod's ambush involving him, a Shrike, A bone Lord, his demonic minions and other allies. We are hard pressed until I let loose the Charm of Justice which levels the field so much that Blackrod flees the field. We loot more and then since we are even more damaged we return the village. <br/> | |||
'''Onwards and upwards into danger''' <br> | |||
We head back up the hill the following afternoon and we make it inside the complex without much trouble. We trace our way slowly back inside and almost get to the centre of the complex. In a crowded corridor outside the nexus we get attacked from the rear by Blackrod and co whilst simultaneously being attacked by a multitude (30) of enveloping nasty shadows from the front. B-rod flees when we once again almost knock him down while i used D-Flames to incinerate the shadows who turned out to be only 6 in number but with multiple images. We pause and then think to enter the nexus .. <br> | |||
'''Into the Nexus''' <br> | |||
We enter and find a corridor followed by a huge almost cathedral like area which is covered in an empathy net effect (this tells those who look at it that its a source of their deepest dreamed treasures) and is the place where we're attacked by a Grack monster (stone scaled flat planed horror) and 210 jackals from a free sending. The Grack was frustrating as I kept hurting myself when it banded damage to me but we finally killed it due to team work and then we dealt with the jackals by scything through them with great results while the immolation burning helped a lot. We then moved on and travelled along a weird pathway, up a chasm and onto a path upon which was a H shaped tower from which emanated pain. We gained entry through skills, managed to kill 2 of the 6 main denizens before a purple worm caused us to become noticed. We managed to MA the worm who we named 'Prince' and a brief pause ensues. We then noticed the other 4 nasties coming for us. We gird our loins once more. <br> | |||
'''The Tower of Terror and Pain'''<br> | |||
We have a hard fight but finally kill the evil deceiver elves. Unfortunately they blow the tower up when they die and we only get to loot a small amount before wondering where to from here. We do get a small saucer which falls from the roof with some interesting contents<br> | |||
'''Too many black men and paths''' <br> | |||
We loot the saucer of what we can and then send the damaged cargo onto a safer place so that we can take them with us rather than leaving them to their nasty fates. We move on, back to where we think we're on track to our destination. We take to the carpet to cross the chasm and see a black figure nearby (who we assume is Blackrod) and we decide to kill him once and for all. We are unpleasantly surprised when he fire-arc's onto the carpet and almost kills Thaeuss in one flurry of blows (he had 6 limbs and was very nasty) and crashes the carpet in the chasm below due to his added weight which injures most of the party. <br/> | |||
It turns out that this is Buwalagatha and we're in the fight of our lives. He grabs Thaeuss's almost dead body and Fire-arc's away to drink potions to make him tougher. We tremble and then move to react. He gets down amongst the party and kills Ophelia in less than half her actions and moves to engage Boris. I heal Thaeuss and spells are cast to little avail. This could be the death of us. We fight a holding action for 2 more pulses while we ready to act. We finally enact a 'hail-mary' plan and pull it off whereby I destroy an artefact called Dipole causing a huge amount of damage to him killing him outright. We pause for breath. We loot him of items, body parts, head etc and itemise what we don't cut up for later examination.<br/> | |||
We follow the path and come out of an apparent cliff face to a starlight lit earthen tree festooned grove with chips of jasper and many paths through the area. I take a [[golden mistletoe]] cutting and some mistletoe too. We look around and choose a path to the left.<br/> | |||
We enter a long avenue from a bush (which we mark) and we proceed towards a large stepped pyramid/temple ahead. We get there and find in its centre a small hut and trapped stairs descending to a lower room designed for entombment and enraging corner dogs as it's all curved. It was designed to call/hold Anak - a Cthonic demon who represents a time paradox around planar creation and involved a Glyph of Revelation which we noted.<br/> | |||
We go back to the top of the temple pyramid and look around. We are in the centre of a 4 way junction. We came here from the south.<br/> | |||
We go north and after a while transition across a boundary and find ourselves on a floating plane of rocks - POO Circus Maximus. We see a he well of darkness and floating nearby stars. We lunch here and recover a bit for 3 hours before moving on once items replenished.<br/> | |||
We return and go west and we find ourselves in a mountainous area POO Haven. We look around some and see a village which we head towards. We encounter a small black man in robes who is a watcher. We talk with him and he's Armin the Turk and he tells us to go back to the temple and the object of our quest is inside a huge worm down the eastern path.<br/> | |||
We also discover that Thaeuss's golem has been possessed by an entity from Victoria named Jerus (aka Jack) who was/is a murderer by trade. We then disintegrated him to render him dead once more - hopefully worse.<br/> | |||
We | We head back towards the temple 'Nexus' and our final objective - still wary of it all. | ||
We | '''And finally''' <br> | ||
We head East | |||
== Places == | == Places == | ||
* Nualis - A map of the central part of Nualis [http://en.wikipedia.org/wiki/File:NE_565ad.jpg Nualis] | * Nualis - A map of the central part of Nualis [http://en.wikipedia.org/wiki/File:NE_565ad.jpg Nualis] | ||
* Ocelotopec A. This is a set of ruins elevated above the valley floor by around 800m. This is a 800m long (N-S) and 300m wide (W-E) level plateau on top of a hill. | |||
* Ocelotopec B. This is a town situated on the valley floor below Upper Ocelotopec and set at alongside a small river (10m wide) and surrounded by a sturdy palisade. The area is some 1500m above sea level and the village is home to around 1200 families. | |||
== People, creatures or entities encountered == | == People, creatures or entities encountered == | ||
* [[Bishop of Trondheim]] in [[Trondheim]] | * [[Bishop of Trondheim]] in [[Trondheim]] | ||
* | * 'The Black Man' aka Buwalagatha, a named hooror of immense power. He has a string carapace, 7 limbs inc one from down below, is a mercenary assassin/tracker for hire to the evil ones in the abyss/void and has a number of innate abilities. | ||
* Substantial Undead | * [[Blackrod]]. We discover he's been here and it appears that he's also looking for the mask. He hangs out with an Incubus and Succubus and an undead giant hawk. | ||
* Itzpapalotl (aka Obsidian Butterfly), a bat goddess. A nice sort if you help her out! | |||
* Charcoalgrin. He is a great Dragon. POO is Haven and he's an Elemental Dragon, around some 70ft in length. a multicoloured (red/green/blue) spined dragon to being one with blackened scales | |||
* Qalamari aka Ithilids aka Mind Flayers aka Calamar | |||
* Grack | |||
* Wormskulls, cross dimensional creatures | |||
* Beholder, eyes to die for | |||
* Substantial Undead, nasty and strong. | |||
* 'The Committee'. a collection of 7 'minds' attached to a single entity | |||
* Scarecrows, inflammatory entities with strength and single minded purpose. | |||
* The Grey Slaad, a nasty frog like creature with suckers for hands and a swarm of frogs at its webbed tips! | |||
* Queen Xiombarg, aka the Queen of Swords, Xiombarg, a power of Chaos recently removed from one of her realms and trying to hold off her brother, Mabelode (also a power of Chaos) from invading her holdings, while she works at recovering and extending her dominion into those dimensions currently ruled the powers of Order, most notably Kalvos. | |||
<br/> | |||
;'''Sethrak of the Bells'''. | |||
:Sethrak is a T'skrang who is a Rank 7 Troubadour. He is 5'9" tall, and has a tail which is 4' 6" long. His top scales are a deep emerald green and his crest and belly scales are a warm, virginal pink. He wears a royal blue frock coat with red piping, a pale green silk shirt with ruffles, a dark brown leather bandolier holding three potion phials, three darts and a heavy crystal parrying dagger, and a broad leather belt with a large brass buckle on which his basket-hilted bronze broadsword hangs. His tail has been weaponised with a ringing bell of bludgeoning. He is dressed from waist to just below the knee in a tight, black taleguilla made from soft leather. | |||
:Abilities | |||
** Sethrak collects song and stories from this world and others. He may ring out in song in such a way that may help an audience come to terms with any trauma or horror that has been visited upon them. | |||
** He is able to sense people he knows by the pattern of their emotions. | |||
** Once a day, resetting at breakfast, Sethrak may take his leave of an encounter unfollowed and unmolested for 4 Pulses by uttering a few charming phrases. To succeed in this, he must roll higher than the Active Magic Resistance of those he wishes to take his leave of by percentile dice and adding his WP + 8 (Break Active MR => WP + 8). A part of this magic is acknowledging the targets of this ''Graceful Exit'', so it may not be attempted against people he cannot see or is unaware of. If the roll is not high enough to affect all of his targets, those unaffected will increase the Rank of their weapons or attack magic by 2 against him (but him alone. This does not increase multi-target abilities.) even if this would take them beyond maximum Rank. If Sethrak should return to the encounter within 24 hours, '''all''' of his previous targets increase their Ranks versus him by 2. | |||
; Movement Rates : Running / Swimming: 250/200 | |||
{{BeastStats| 19| 22 | 24 | 13 | 18 |23| 24 | 17 | 18 |7/4 | Scales absorb 4}} | |||
; Weapons | |||
: '''Broadsword''': SC 114%, 2 rollup D10 + 2, Melee, B Class damage, Rank 7 | |||
:'''Crystal Parrying Dagger''': SC 116%, [1 rollup D10 + 2], Melee & Close, A Class damage, Rank 10 | |||
:'''Ringing Bell''': SC 112%, 2 rollup D10, Melee, C Class damage, Rank 6 | |||
:The pommel stone of the broadsword is an enormous catseye. On a D10 roll that is a prime number, Sethrak can see behind him, meaning bonuses that normally apply for rear attacks are ignored. Additionally, if successful, he can strike into his rear hex with the bell, and this is a Free Act. If the bell strikes a summonable entity or construct, damage increases to 3 rollup D10. | |||
:'''Defence:''' 56, 42 vs thrown & missile attacks, but may avoid a blow once per Pulse by Breaking 100 => AG + 8, '''MR:''' 51%, 67% versus magic that attacks the personality (Charm, Fear, Compelling Obedience ,etc). His frock coat provides 6 points of spell armour. | |||
<br/> | |||
;[[Image:BloodElfNethermancer.jpg|left|130px|Avenging Claw]] | |||
:'Avenging Claw', a nethermancer based in Ocelotopec B: a blood elf with very spiky thorns about his person. He is here to deal with an anticipated danger from a "black man" to his blood queen. His date name is 7 Flower. His spell rack holds 7 matrices. <br> | |||
Avenging Claw can cast a spell (at a cost of 350sp) which increases how much an entity recovers as a function of natural healing. The spell lasts for a maximum of 16 days, and when natural healing occurs, the value is increased by 15 points.<br/> | |||
<br/> | |||
;'''A hobgoblin who runs an Apothecary'''. | |||
== Wares from the Apothecary == | |||
=== Silver Death Grenado === | |||
This hollow glass grenado has two chambers. The one at the bottom contains a 1/2 lb collection of dark grey metal beads the size of match heads. The other chamber contains water. It weighs 3 lbs in total. When it is broken, the water reacts with the metal which burns silver, shattering the heavy glass which will generate 2 Specific Grievous injuries from flying glass shards. The wet metals beads will be distributed over a megahex volume and inflict 3 rollup D10 corrosive damage.<br> | |||
750sp value<br> | |||
=== Potion of Astral Sight === | |||
This phial weighs 1/4 lb and must be Prepared before it can be consumed. It allows a character to see into the astral plane for 7 minutes to a range of 165 feet. The potion allows the drinker to make an Astral Sight test by rolling percentile dice and adding their MA + PC at a cost of 1 point of Strain. If the result is greater than 30, they can see into the plane. Subsequent attempts can be made in the hopes of generating a better test result, each costing a point of Strain. Any entities lurking in the astral whose Active Magic Resistance is less than or equal to the test result will be detected. Invisible entities will only be detected if the Rank of the spell is less than 11. <br> | |||
Rank 10, 2,500sp<br> | |||
=== Healing Sleep Draughts === | |||
This phial weighs 1/4 oz and must be Prepared before it can be consumed. It contains a standard Healing Sleep Draught.<br> | |||
Rank 2 - 7 available, 50sp per Rank <br/> | |||
; '''A human talismonger. He has a range of talisman, amulets and such.''' | |||
== Wares from the Talismonger == | |||
=== Blood Amulet of Three === | |||
This amulet is a tiny crystal phial an inch long and half an inch around. It weighs 2 oz. It must be pinned on the chest just below the left shoulder. <br> | |||
If the wearer receives a Specific Grievous Injury to the left shoulder or chest, then they must Break 100 + 30 to avoid the destroying the charm.<br> | |||
A little of the wearer's blood must be poured into the phial costing three points of FT, which the wearer may not recover until the amulet is used. When the amulet is used, requiring a Free Act, the wearer' rolls 2 D10 in the place of %ile dice checks and discards the low result. The high result is taken to be the "1"s value, the "10"s value automatically being 0 while the effect lasts, which is for three Pulses.<br> | |||
This amulet may only be filled on an equinox or solstice.<br> | |||
12,000sp | |||
=== Blood Amulet of the Chalice === | |||
This amulet is a carved out of soapstone in the shape of a chalice about half an inch in diameter. It weighs 2 oz. It must be pinned on the inside of the left forearm. <br> | |||
If the wearer receives a Specific Grievous Injury to the left arm or hand, then they must Break 100 + 40 to avoid the charm being destroyed.<br> | |||
A little of the wearer's blood must be poured into the chalice costing 3 FT, the chalice being sealed with wax afterward. The wearer may not recover the FT until the amulet is used. When the seal is broken, requiring a Free Act, the wearer' is cured of three points of damage per Pulse for 3 Pulses.<br> | |||
This amulet may only be filled at dusk on a Saturday.<br> | |||
12,000sp | |||
=== Blood Amulet of the Thorn === | |||
This amulet is made from a lancet of whitethorn 3 inches long and weighing 2 oz. It must be driven into the flesh inside the right collarbone, between the shoulder and the neck. <br> | |||
If the wearer receives a Specific Grievous Injury to the right shoulder, then they must Break 100 + 40 to avoid the destroying the charm.<br> | |||
A little of the wearer's blood must be poured into the phial costing three points of FT, which the wearer may not recover until the amulet is used. This will reduce the wearer's maximum FT value by three. The wearer may not recover the FT until the amulet is used. When the thorn is drawn out, requiring a Free Act, the wearer' MA is increased by 9 for the next 3 Pulses. <br> | |||
This amulet may only be filled at midnight on a night of the full moon.<br> | |||
12,000sp | |||
=== Blood Amulet of Seiðr === | |||
This amulet is made from holly berries preserved in pine resin in a rosette 3 inches across. It must be worn above the heart.<br> | |||
If the wearer receives a Specific Grievous Injury to the heart or chest, then they must Break 100 + 40 to avoid the charm's destruction.<br> | |||
A little of the wearer's blood must be poured onto the resin changing the colour of the berries to scarlet and reducing the wearer's FT value by three. The wearer may not recover this FT until the amulet is used. When the berries are squeezed as a part of a Cast Action, the rank of the spell is increased by three. <br> | |||
This amulet may only be recharged at the setting of the sun.<br> | |||
12,000sp | |||
=== Blood Amulet of the Shield === | |||
This amulet is made from turquoise shaped into a phial 1 inch high. It must be worn on the left arm.<br> | |||
If the wearer receives a Specific Grievous Injury to the left arm or hand, then they must Break 100 + 40 to avoid the destroying the charm.<br> | |||
A little of the wearer's blood must be poured into phial and sealed with wax. This will reduce the wearer's maximum FT value by three. The wearer may not recover until the amulet is used. As a Reflex Action, the wearer may increase their Protection by 12 A Reflex Action does not count as an Action or Free Act, however, only 1 Reflex Action is allowed per Pulse, so any others that the bearer may have become inaccessible until the next Pulse.<br> | |||
This amulet may only be recharged at the setting of the sun on the last day of the Full Moon.<br> | |||
12,000sp | |||
=== Blood Amulet of the Crimson Oak === | |||
This amulet is made of a splinter of oak and must be attached to the wearer's primary forearm with a bronze pin. If the wearer receives a Specific Grievous Injury to that arm or hand, then they must Break 100 + 20 to avoid the charm being destroyed.<br> | |||
Three drops of blood (costing 3 FT) must be spilt onto the oak staining it crimson. This FT may not be recovered until after the charm has been used. As a part of an attack with a weapon in their primary hand, the wearer may increase either: | |||
* the Strike Chance of that weapon by 30 | |||
: or | |||
* the damage inflicted with that weapon by 6<br> | |||
This amulet may only recharged at noon. | |||
12,000sp | |||
=== Blood Amulet of Desperate Hope === | |||
This amulet is made of 1 half inch bead of jade cut into the shape of a lotus which must be woven into the wearer's beard or hair to be effective. If the wearer receives a Specific Grievous Injury to the head, then they must Break 100 + 40 to avoid the charm being destroyed.<br> | |||
Two drops of blood (costing 2 FT) must be spilt onto the lotus staining it crimson. This FT may not be recovered until after the charm has been used. <br> | |||
As a Free Act, the amulet may be used to increase the wearer's Defence and Magical Resistance by 15 versus Horrors or their constructs for 2 Pulses.<br> | |||
This amulet may only be recharged at dawn.<br> | |||
15,000sp | |||
=== Second Chance Amulet === | |||
This amulet is made from glass shaped into a phial 1 inch high. It must be worn over the heart.<br> | |||
If the wearer receives a Specific Grievous Injury to the chest, then they must Break 100 + 40 to avoid the destroying the charm.<br> | |||
A little of the wearer's blood must be poured into phial and sealed with wax. This will reduce the wearer's maximum FT value by one. The wearer may not recover this FT until after the amulet is used. In the event that the wearer's health is reduced to the point where they would die, 1 rollup D10 check is made and applied as healing. This will destroy the amulet <br> | |||
300sp | |||
<br/> | |||
; <s>Tondrac</s> is a spokesman for the mercenaries in town. He is an 8ft tall hobgoblin, seems weasely and slenderer than his height would suggest. His plane of origin is Parvuli. | |||
== Wares from Tondrac == | |||
=== Green Glass Sabre === | |||
This glass sabre has been enchanted to be as durable as steel, and weighs 2lbs. It requires PS 12 and MD 15 to wield, has a base Strike Chance of 61%, and inflicts 1 rollup D10 + 5. It inflicts an additional rollup D10 versus plants or plant-based creatures. | |||
=== Red Glass Sabre === | |||
This glass sabre has been enchanted to be as durable as steel, and weighs 2lbs. It requires PS 12 and MD 15 to wield, has a base Strike Chance of 61%, and inflicts 1 rollup D10 + 5. It inflicts an additional rollup D10 versus fiery or fire-based creatures. | |||
=== Obsidian & Pepperwood Macuahuitl === | |||
This weapon is made from a length of fire-hardened wood into which has been embedded 13 obsidian teeth. It is treated as a broadsword, requires PS 13 and MD 15 to wield. It has a base Strike Chance of 67% and inflicts 2 rollup D10. Any attempt to over-strength the macuahuitl will damage one of the teeth. When all of the teeth are broken, the wooden spine and hilt will crumble to a pale brown dust. | |||
=== Hardened Silk Armour === | |||
This armour will fit a person of size 6. It is made from lozenges of dark blue and black silk, quilted and hardened in some fashion. It provides Protection 6, Spell Armour 4 and Damage Reduction 3. It weighs 1 lb, provides no penalty to AG and improves Stealth by 10. | |||
=== Brass & Pearl Astralabe === | |||
This brass sphere is bound inside two silver rings, a brass arrow emerging from its north pole. To activate the device, the wielder expends a point of MA through the device, and for the next hour, it will attempt to detect the most corrupted Astral space in range. If on the Material plane, the range is 10 miles times the user's remaining MA and is automatically successful unless no corrupted Astral space is within range. If on the Astral plane, the range is limited only to the world's the user knows, but the user must roll under 1 x remaining MA. <br> | |||
MA spent in this way is recovered at a rate of 1 per 3 days, so long as they spend no more than half their FT. | |||
; '''a gnome jewelcrafter / binder who specialises in microfauna animates amongst other things''' | |||
== Wares from the Jewelcrafter == | |||
=== Feathered Serpent === | |||
This metre long snake is made from orichalcum with feathers crafted from glass in shades of blue or green and weighs 22 oz. It will wind decoratively around a walking stick, staff or haft of a pole weapon. When it is animate, it has the following characteristics: | |||
; Abilities | |||
: The serpent may crawl, fly (to a ceiling of Rank metres) and deliver an electrical attack as outlined below. It is an animate, and is never affected by Specific Grievous injuries or magic that targets the personality (Charm, Fear, Compelling Obedience, etc). | |||
; Movement Rates : Running / Climbing / Flying: 200/100/150 + 25 yards per minute per Rank in Animating Objects | |||
{{BeastStats| 3| None | 22 | None | 2 | 4 | 18 | 17 | 10 |4/2/3* | Feathers reduce damage by 3}} | |||
; Weapons | |||
: '''Arc''': Auto, 1 rollup D10 + 1 / 2 Ranks, MC, Electrical damage, Range: 5 feet + 1 foot per Rank | |||
:'''Bite''': BC 40%, [1 rollup D10], Close, Rank =1 per 2 Ranks. | |||
PS, AG, WP, EN, FT & PC values increase at a rate of 1 for every 5 Ranks. PB increases at 1 for every 2 Ranks. The Arc attack costs 2 FT. <br> | |||
'''*''' Flying TMR increases at 1 for every 2 Ranks in Animating Objects.<br> | |||
14,000sp | |||
=== Bronze Scorpion === | |||
This bronze casting of a scorpion weighs 3 lbs and is a legal target for the Animating Objects spell.<br> | |||
When it is thus animated, it will have a movement rate of 250 yards per minute on the ground. <br> | |||
It is hollow, and its abdomen contains a reservoir into which blade venom may be poured. | |||
{{BeastStats| 6 | 15 | 18 | None | 15 | 18 | 15 | 11 | 4 | 5 | Bronze body reduces damage by 6 }} '''*'''Note that the natural armour is solid bronze and therefore reduces all damage by 6.<br> | |||
;Weapons | |||
:'''Sting''': BC 25%, [1 rollup D + 1 / 2 Ranks] , A Class damage, Close, Rank =1 per 2 Ranks. | |||
:'''Pincer''' BC 35% [1 rollup D10], -, Close, Rank = 1 per 2 Ranks | |||
It may deliver 2 Pincer and 1 Sting attack without penalty. | |||
Poison damage occurs when the sting inflicts damage, and is determined by the blade venom poured into the reservoir.<br> | |||
8,000sp | |||
== Buffs & Mil Sci == | == Buffs & Mil Sci == | ||
| Line 77: | Line 344: | ||
!Title="Thaeuss" | Th | !Title="Thaeuss" | Th | ||
!Title="Tsayoi" | Ts | !Title="Tsayoi" | Ts | ||
!Title=" | !Title="Daisy" | Da | ||
!Title="?????" | ?? | !Title="?????" | ?? | ||
|- | |- | ||
| Line 88: | Line 355: | ||
| <!-- Th --> | | <!-- Th --> | ||
| <!-- Ts --> | | <!-- Ts --> | ||
| <!-- | | <!-- Da --> | ||
| <!-- ?? --> | | <!-- ?? --> | ||
|- | |- | ||
|class="mg" | | |class="mg" |Strength of Stone (Ts) | ||
|class="rk" | | |class="rk" | 10 | ||
|class="ef" | | |class="ef" | | ||
|class="du" | | |class="du" | | ||
| <!-- Bo --> | | <!-- Bo --> y | ||
| <!-- Ma --> | | <!-- Ma --> y | ||
| <!-- Th --> | | <!-- Th --> y | ||
| <!-- Ts --> | | <!-- Ts --> y | ||
| <!-- | | <!-- Da--> y | ||
| <!-- ?? --> | | <!-- ?? --> | ||
|- | |- | ||
| Line 110: | Line 377: | ||
| <!-- Th --> Y | | <!-- Th --> Y | ||
| <!-- Ts --> Y | | <!-- Ts --> Y | ||
| <!-- | | <!-- Da--> | ||
| <!-- ?? --> | | <!-- ?? --> | ||
|- | |- | ||
| Line 121: | Line 388: | ||
| <!-- Th --> Y | | <!-- Th --> Y | ||
| <!-- Ts --> Y | | <!-- Ts --> Y | ||
| <!-- | | <!-- Da--> | ||
| <!-- ?? --> | | <!-- ?? --> | ||
|- | |- | ||
| Line 132: | Line 399: | ||
| <!-- Th --> | | <!-- Th --> | ||
| <!-- Ts --> | | <!-- Ts --> | ||
| <!-- | | <!-- Da--> | ||
| <!-- ?? --> | | <!-- ?? --> | ||
|- | |- | ||
| Line 143: | Line 410: | ||
| <!-- Th --> Y | | <!-- Th --> Y | ||
| <!-- Ts --> - | | <!-- Ts --> - | ||
| <!-- | | <!-- Da--> - | ||
| <!-- ?? --> - | | <!-- ?? --> - | ||
|- | |- | ||
| Line 154: | Line 421: | ||
| <!-- Th --> Bo | | <!-- Th --> Bo | ||
| <!-- Ts --> Th | | <!-- Ts --> Th | ||
| <!-- | | <!-- Da--> | ||
| <!-- ?? --> | | <!-- ?? --> | ||
|} | |} | ||
| Line 168: | Line 435: | ||
!Title="Thaeuss" | Th | !Title="Thaeuss" | Th | ||
!Title="Tsayoi" | Ts | !Title="Tsayoi" | Ts | ||
!Title=" | !Title="Daisy" | Da | ||
!Title="?????" | ?? | !Title="?????" | ?? | ||
|- | |- | ||
| Line 179: | Line 446: | ||
| <!-- Th --> | | <!-- Th --> | ||
| <!-- Ts --> | | <!-- Ts --> | ||
| <!-- | | <!-- Da--> | ||
| <!-- ?? --> | | <!-- ?? --> | ||
|- | |- | ||
| Line 190: | Line 457: | ||
| <!-- Th --> | | <!-- Th --> | ||
| <!-- Ts --> | | <!-- Ts --> | ||
| <!-- | | <!-- Da--> | ||
| <!-- ?? --> | | <!-- ?? --> | ||
|} | |} | ||
| Line 246: | Line 513: | ||
'''Party funds (to be deducted from the sp value at the end of the game'''; <br> | '''Party funds (to be deducted from the sp value at the end of the game'''; <br> | ||
- from Naden (by way of AB-V). | - from Naden (by way of AB-V). | ||
* 5 potions of reason restored @ 6,500sp - 32,500sp | * 5 potions of reason restored @ 6,500sp - 32,500sp. 1 used by Boris in mummy fight | ||
'''Tsayoi personal funds''' <br> | '''Tsayoi personal funds''' <br> | ||
* 3 Dragonsmite Investeds (rank 11, D+43, BC99) from Flamis 12,000 sp | * 3 Dragonsmite Investeds (rank 11, D+43, BC99) from Flamis 12,000 sp | ||
* 3 Waters of Strength from Father Rowan (0sp) | * 3 Waters of Strength from Father Rowan (0sp) | ||
* 3 Waters of Strength from Prue (0sp) | * 3 Waters of Strength from Prue (0sp) - 2 used | ||
* 3 Waters of Healing from Prue (0sp) | * 3 Waters of Healing from Prue (0sp) - 1 used | ||
* 3 Waters of Dexterity from Prue (0sp) | * 3 Waters of Dexterity from Prue (0sp) | ||
* 2 Potions of Protection from Naden (by way of AB-V) @ 6000sp ea - 12,000 sp | * 2 Potions of Protection from Naden (by way of AB-V) @ 6000sp ea - 12,000 sp - 1 used vs MF's, another vs X | ||
* 2 Potions of Mind Cloak from Naden (by way of AB-V) @ 6250sp ea - 12,500 sp | * 2 Potions of Mind Cloak from Naden (by way of AB-V) @ 6250sp ea - 12,500 sp - 1 used | ||
* 5 Restoratives (Rank 10 +24FT/-12EN) from Naden (by way of AB-V) @ 750sp ea - 3750sp | * 5 Restoratives (Rank 10 +24FT/-12EN) from Naden (by way of AB-V) @ 750sp ea - 3750sp - 3 used | ||
* 5 Scrolls of Trollskin from Basilic @ 1800sp ea - 9,000sp | * 5 Scrolls of Trollskin from Basilic @ 1800sp ea - 9,000sp | ||
* 1 Amulet of Jasper from Sooty - 16,000sp | * 1 Amulet of Jasper from Sooty - 16,000sp | ||
| Line 272: | Line 539: | ||
'''Thaeuss personal funds''' <br> | '''Thaeuss personal funds''' <br> | ||
* 1 Amulet of Jasper from Sooty - 16,000sp | * 1 Amulet of Jasper from Sooty - 16,000sp | ||
'''Boris personal funds''' <br> | '''Boris personal funds''' <br> | ||
TBA | TBA | ||
== Awards == | Purchased in Lower Ocelotopec.<br> | ||
* A potion of Astral Sight - to mario for use | |||
* A silver death grenado - free to test and report back. Used and reported back. | |||
* We discover that the Blue liquid vials are 12 spots - very valuable. | |||
=== Awards === | |||
[[Fallen Ocelotepec - Boris' Award| Boris' Award]]<br> | |||
[[Fallen Ocelotepec - Mario's Award| Mario's Award]]<br> | |||
[[Fallen Ocelotepec - Ophelia's Award| Ophelia's Award]]<br> | |||
[[Fallen Ocelotepec - Thaeuss' Award| Thaeuss' Award]]<br> | |||
[[Fallen Ocelotepec - Tsayoi's Award| Tsayoi's Award]] | |||
=== Experience === | === Experience === | ||
=== Treasure === | === Treasure === | ||
[[Fallen Ocelotepec - Treasure|Treasure - Master List]]<br> | [[Fallen Ocelotepec - Treasure|Treasure - Master List]]<br> | ||
Note; the Black Opal from the star gods room can store 6 Star points (due to value between 6-7,000sp | |||
''Jim: a list of random stuff.'' | |||
* itemised gold throne | |||
* Heavy Brocaded Robes inc gems | |||
* Blackrod's heart | |||
From Blackrod's / His Incubus - glaive, dagger, tail, black vial, heart, staff, | |||
* A number of darkness shedding torches | |||
* 6 stone garmek scales | |||
* Jackals on the edge of twilight (210)? if we go back to get these. Ophelia | |||
* From 2 early deceivers - silkie robes, satin tuner, needles&scaples, codex of , 2 rings (ring lored), 1 eye, 2 staunch potions of healing, 2 flesh pots, rubes on/in a shirt, head of a unicorn. | |||
* from 4 deceivers - environmental suits, enhanced exoskeltons | |||
* From Fleeing deceiver: Potion from the escaping deceiver, Remote trigger for a trap | |||
* From Buwalagatha: Eyes, Claws, head, carapace to make a huge breastplate or shields (BP would add +5AP to a max of 12, as shields could make 2 kite shields that would act as tower shields with one being left handed and the other right handed - MD-3 and weight10lbs) ?, 14 potions, dice investeds, 15 madness and 15 hunt points. Ring of Gifts w 3 major wishes and a finger curse associated with each wish. | |||
* From Starlight grove: Golden Mistletoe cutting for later planting at home | |||
* From temple: Magical trap tile - wall of stone and earth tremor. | |||
* 42 lbs of fermit | |||
* immolation berries, flamecap mushrooms and other cuttings such as golden mistletoe etc have been left in the fermit lined cave of the worm - for future harvesting. ANY OTHER SEEDS OR SUCHLIKE TO BE LEFT THERE? | |||
* Flying saucer | |||
* worm bones of elemental bronze | |||
* Sword Hand 1/2 treated as steel - can be weaponsmithed | |||
* wolf blood potion | |||
* crystal pieces that can be melted down into amorphous metal | |||
Individual Awards: <br> | Individual Awards: <br> | ||
| Line 305: | Line 610: | ||
!Title="Thaeuss" | Th | !Title="Thaeuss" | Th | ||
!Title="Mario" | Ma | !Title="Mario" | Ma | ||
!Title=" | !Title="Ophelia"| Op | ||
!Title="Used Up/Lost/Traded" | Used | !Title="Used Up/Lost/Traded" | Used | ||
!Title="Origin" | Provenance | !Title="Origin" | Provenance | ||
| Line 311: | Line 616: | ||
!colspan="11"| Type | !colspan="11"| Type | ||
|- | |- | ||
|class="itm" | [[Fallen_Ocelotepec_-_Treasure| | |class="itm" | [[Fallen_Ocelotepec_-_Treasure|tbc]] Celestial Stones | ||
|class="qty" | 1 set | |||
|class="ef" | Aligned with Celestial bodies. 6 quality Heliodors, onyx and quartz | |||
| <!-- Bo --> | |||
| <!-- Ts --> 1 | |||
| <!-- Th --> | |||
| <!-- Ma --> | |||
| <!-- Op --> | |||
| <!-- Used --> | |||
| <!-- Provenance --> God House | |||
|- | |||
|class="itm" | [[Fallen_Ocelotepec_-_Treasure|Luminal Flux]] | |||
|class="qty" | | |||
|class="ef" | | |||
| <!-- Bo--> | |||
| <!-- Ts --> | |||
| <!-- Th --> 1 | |||
| <!-- Ma --> | |||
| <!-- Op --> | |||
| <!-- Used --> | |||
| <!-- Provenance --> Mummy | |||
|- | |||
|class="itm" | [[Fallen_Ocelotepec_-_Treasure|Wet Elf Petigo]] | |||
|class="qty" | | |class="qty" | | ||
|class="ef" | | |class="ef" | | ||
| <!-- Bo--> | | <!-- Bo--> | ||
| <!-- Ts --> | |||
| <!-- Th --> 1 | |||
| <!-- Ma --> | |||
| <!-- Op --> | |||
| <!-- Used --> | |||
| <!-- Provenance --> Mummy | |||
|- | |||
|class="itm" | [[Fallen_Ocelotepec_-_Treasure|Troll Ague]] | |||
|class="qty" | | |||
|class="ef" | | |||
| <!-- Bo--> 1 | |||
| <!-- Ts --> | | <!-- Ts --> | ||
| <!-- Th --> | | <!-- Th --> | ||
| <!-- Ma --> | | <!-- Ma --> | ||
| <!-- x --> | | <!-- Op --> | ||
| <!-- Used --> | |||
| <!-- Provenance --> Mummy | |||
|- | |||
|class="itm" | [[Fallen_Ocelotepec_-_Treasure|Wraith Shadows]] | |||
|class="qty" | 13 | |||
|class="ef" | 3 spots x 13 | |||
| <!-- Bo--> 2 | |||
| <!-- Ts --> 2 | |||
| <!-- Th --> 3 | |||
| <!-- Ma --> 3 | |||
| <!-- Op --> 3 | |||
| <!-- Used --> | |||
| <!-- Provenance --> Mummy fight | |||
|- | |||
|class="itm" | [[Fallen_Ocelotepec_-_Treasure|Wraith Shadows]] | |||
|class="qty" | 2 | |||
|class="ef" | 3 star x 2 | |||
| <!-- Bo--> 3 | |||
| <!-- Ts --> 3 | |||
| <!-- Th --> 3 | |||
| <!-- Ma --> 3 | |||
| <!-- Op --> 3 | |||
| <!-- Used --> | |||
| <!-- Provenance --> Mummy fight | |||
|- | |||
|class="itm" | [[Fallen_Ocelotepec_-_Treasure|Sweet Regret]] | |||
|class="qty" | 3 | |||
|class="ef" | | |||
| <!-- Bo--> | |||
| <!-- Ts --> | |||
| <!-- Th --> | |||
| <!-- Ma --> | |||
| <!-- Op --> 3 | |||
| <!-- Used --> | | <!-- Used --> | ||
| <!-- Provenance --> | | <!-- Provenance --> | ||
|- | |- | ||
|class="itm" | [[Fallen_Ocelotepec_-_Treasure| | |class="itm" | [[Fallen_Ocelotepec_-_Treasure|Brain Serum]] | ||
|class="qty" | | |class="qty" | | ||
|class="ef" | | |class="ef" | | ||
| <!-- Bo--> | | <!-- Bo--> | ||
| <!-- Ts --> | | <!-- Ts --> | ||
| <!-- Th --> 1 | |||
| <!-- Ma --> | |||
| <!-- Op --> | |||
| <!-- Used --> | |||
| <!-- Provenance --> | |||
|- | |||
|class="itm" | [[Fallen_Ocelotepec_-_Treasure|Black Eog Parts]] | |||
|class="qty" | | |||
|class="ef" | | |||
| <!-- Bo--> | |||
| <!-- Ts --> | |||
| <!-- Th --> | |||
| <!-- Ma --> | |||
| <!-- Op --> | |||
| <!-- Used --> | |||
| <!-- Provenance --> Tower of Pain | |||
|- | |||
|class="itm" | [[Fallen_Ocelotepec_-_Treasure|A Door made of Ent Wood]] | |||
|class="qty" | 1 | |||
|class="ef" | | |||
| <!-- Bo--> | |||
| <!-- Ts --> | |||
| <!-- Th --> | |||
| <!-- Ma --> | |||
| <!-- Op --> | |||
| <!-- Used --> | |||
| <!-- Provenance --> Tower of Pain | |||
|- | |||
|class="itm" | [[Fallen_Ocelotepec_-_Treasure|Sacred Incense]] | |||
|class="qty" | 3 | |||
|class="ef" | Narcotic | |||
| <!-- Bo--> | |||
| <!-- Ts --> | |||
| <!-- Th --> 3 | |||
| <!-- Ma --> | |||
| <!-- Op --> | |||
| <!-- Used --> | |||
| <!-- Provenance --> Gods house | |||
|- | |||
|class="itm" | [[Fallen_Ocelotepec_-_Treasure|Enhanced Willpower Draught]] | |||
|class="qty" | 2 | |||
|class="ef" | | |||
| <!-- Bo--> | |||
| <!-- Ts --> | |||
| <!-- Th --> | |||
| <!-- Ma --> | |||
| <!-- Op --> | |||
| <!-- Used --> | |||
| <!-- Provenance --> | |||
|- | |||
|class="itm" | [[Fallen_Ocelotepec_-_Treasure|Oil of Sharpness]] | |||
|class="qty" | | |||
|class="ef" | | |||
| <!-- Bo--> | |||
| <!-- Ts --> 1 | |||
| <!-- Th --> | | <!-- Th --> | ||
| <!-- Ma --> | | <!-- Ma --> | ||
| <!-- | | <!-- Op --> | ||
| <!-- Used --> | | <!-- Used --> | ||
| <!-- Provenance --> | | <!-- Provenance --> | ||
|- | |- | ||
|class="itm" | [[Fallen_Ocelotepec_-_Treasure| | |class="itm" | [[Fallen_Ocelotepec_-_Treasure|Potion of Wisdom]] | ||
|class="qty" | | |||
|class="ef" | | |||
| <!-- Bo--> | |||
| <!-- Ts --> | |||
| <!-- Th --> 1 | |||
| <!-- Ma --> | |||
| <!-- Op --> | |||
| <!-- Used --> | |||
| <!-- Provenance --> | |||
|- | |||
|class="itm" | [[Fallen_Ocelotepec_-_Treasure|Potion of Waters of Strength]] | |||
|class="qty" | | |class="qty" | | ||
|class="ef" | | |class="ef" | | ||
| Line 340: | Line 777: | ||
| <!-- Th --> | | <!-- Th --> | ||
| <!-- Ma --> | | <!-- Ma --> | ||
| <!-- | | <!-- Op --> 1 | ||
| <!-- Used --> | | <!-- Used --> | ||
| <!-- Provenance --> | | <!-- Provenance --> | ||
|- | |- | ||
|class="itm" | [[Fallen_Ocelotepec_-_Treasure| | |class="itm" | [[Fallen_Ocelotepec_-_Treasure|Potion of Walk on Water]] | ||
|class="qty" | | |class="qty" | | ||
|class="ef" | | |class="ef" | | ||
| Line 351: | Line 788: | ||
| <!-- Th --> | | <!-- Th --> | ||
| <!-- Ma --> | | <!-- Ma --> | ||
| <!-- | | <!-- Op --> 1 | ||
| <!-- Used --> | |||
| <!-- Provenance --> | |||
|- | |||
|class="itm" | [[Fallen_Ocelotepec_-_Treasure|Potion of Enhanced Healing]] | |||
|class="qty" | 7 | |||
|class="ef" | | |||
| <!-- Bo--> 1 | |||
| <!-- Ts --> 1 | |||
| <!-- Th --> 1 | |||
| <!-- Ma --> 1 | |||
| <!-- Op --> 1 | |||
| <!-- Used --> | |||
| <!-- Provenance --> the Committee | |||
|- | |||
|class="itm" | [[Fallen_Ocelotepec_-_Treasure|Staunch Potion of Healing]] | |||
|class="qty" | 6 | |||
|class="ef" | | |||
| <!-- Bo--> 1 | |||
| <!-- Ts --> 1 | |||
| <!-- Th --> 1 | |||
| <!-- Ma --> 1 | |||
| <!-- Op --> 2 | |||
| <!-- Used --> | |||
| <!-- Provenance --> the Committee | |||
|- | |||
|class="itm" | [[Fallen_Ocelotepec_-_Treasure|Potion of Curing]] | |||
|class="qty" | 5 | |||
|class="ef" | | |||
| <!-- Bo--> 1 | |||
| <!-- Ts --> 1 | |||
| <!-- Th --> 1 | |||
| <!-- Ma --> 1 | |||
| <!-- Op --> 1 | |||
| <!-- Used --> | |||
| <!-- Provenance --> the Committee | |||
|- | |||
|class="itm" | [[Fallen_Ocelotepec_-_Treasure|Slap]] | |||
|class="qty" | 10 | |||
|class="ef" | | |||
| <!-- Bo--> 2 | |||
| <!-- Ts --> 2 | |||
| <!-- Th --> 2 | |||
| <!-- Ma --> 2 | |||
| <!-- Op --> 2 | |||
| <!-- Used --> | |||
| <!-- Provenance --> the Committee | |||
|- | |||
|class="itm" | [[Fallen_Ocelotepec_-_Treasure|Jazz]] | |||
|class="qty" | 5 | |||
|class="ef" | | |||
| <!-- Bo--> 1 | |||
| <!-- Ts --> 1 | |||
| <!-- Th --> 1 | |||
| <!-- Ma --> 1 | |||
| <!-- Op --> 1 | |||
| <!-- Used --> | |||
| <!-- Provenance --> the Committee | |||
|- | |||
|class="itm" | [[Fallen_Ocelotepec_-_Treasure|Ichor of the Sun]] | |||
|class="qty" | 1 | |||
|class="ef" | | |||
| <!-- Bo--> | |||
| <!-- Ts --> | |||
| <!-- Th --> 1 | |||
| <!-- Ma --> | |||
| <!-- Op --> | |||
| <!-- Used --> | |||
| <!-- Provenance --> | |||
|- | |||
|class="itm" | [[Fallen_Ocelotepec_-_Treasure|Ichor of the Sun Antodote]] | |||
|class="qty" | 1 | |||
|class="ef" | | |||
| <!-- Bo--> | |||
| <!-- Ts --> | |||
| <!-- Th --> | |||
| <!-- Ma --> 1 | |||
| <!-- Op --> | |||
| <!-- Used --> | |||
| <!-- Provenance --> | |||
|- | |||
|class="itm" | [[Fallen_Ocelotepec_-_Treasure|Scroll of Thaumaturgy]] | |||
|class="qty" | | |||
|class="ef" | | |||
| <!-- Bo--> | |||
| <!-- Ts --> | |||
| <!-- Th --> | |||
| <!-- Ma --> 1 | |||
| <!-- Op --> | |||
| <!-- Used --> | | <!-- Used --> | ||
| <!-- Provenance --> | | <!-- Provenance --> | ||
|- | |- | ||
|class="itm" | [[Fallen_Ocelotepec_-_Treasure| | |class="itm" | [[Fallen_Ocelotepec_-_Treasure|Bronze Keyring]] | ||
|class="qty" | | |class="qty" | | ||
|class="ef" | | |class="ef" | | ||
| Line 362: | Line 887: | ||
| <!-- Th --> | | <!-- Th --> | ||
| <!-- Ma --> | | <!-- Ma --> | ||
| <!-- | | <!-- Op --> | ||
| <!-- Used --> 1 | |||
| <!-- Provenance --> | |||
|- | |||
|class="itm" | [[Fallen_Ocelotepec_-_Treasure|Celestial Scroll]] | |||
|class="qty" | | |||
|class="ef" | | |||
| <!-- Bo--> | |||
| <!-- Ts --> 1 | |||
| <!-- Th --> | |||
| <!-- Ma --> | |||
| <!-- Op --> | |||
| <!-- Used --> | | <!-- Used --> | ||
| <!-- Provenance --> | | <!-- Provenance --> | ||
|- | |- | ||
|class="itm" | [[Fallen_Ocelotepec_-_Treasure| | |class="itm" | [[Fallen_Ocelotepec_-_Treasure|Enchiridion]] | ||
|class="qty" | | |class="qty" | | ||
|class="ef" | | |class="ef" | | ||
| <!-- Bo--> | | <!-- Bo--> | ||
| <!-- Ts --> | |||
| <!-- Th --> 1 | |||
| <!-- Ma --> | |||
| <!-- Op --> | |||
| <!-- Used --> | |||
| <!-- Provenance --> | |||
|- | |||
|class="itm" | [[Fallen_Ocelotepec_-_Treasure|Wand of Conjuring Darkness]] | |||
|class="qty" | | |||
|class="ef" | | |||
| <!-- Bo--> 1 | |||
| <!-- Ts --> | | <!-- Ts --> | ||
| <!-- Th --> | | <!-- Th --> | ||
| <!-- Ma --> | | <!-- Ma --> | ||
| <!-- | | <!-- Op --> | ||
| <!-- Used --> | | <!-- Used --> | ||
| <!-- Provenance --> | | <!-- Provenance --> | ||
|- | |- | ||
|class="itm" | [[Fallen_Ocelotepec_-_Treasure| | |class="itm" | [[Fallen_Ocelotepec_-_Treasure|Wand of Disguise]] | ||
|class="qty" | | |class="qty" | | ||
|class="ef" | | |class="ef" | | ||
| Line 384: | Line 931: | ||
| <!-- Th --> | | <!-- Th --> | ||
| <!-- Ma --> | | <!-- Ma --> | ||
| <!-- | | <!-- Op --> 1 | ||
| <!-- Used --> | | <!-- Used --> | ||
| <!-- Provenance --> | | <!-- Provenance --> | ||
|- | |- | ||
|class="itm" | [[Fallen_Ocelotepec_-_Treasure| | |class="itm" | [[Fallen_Ocelotepec_-_Treasure|Wand of Disguise]] | ||
|class="qty" | | |||
|class="ef" | | |||
| <!-- Bo--> | |||
| <!-- Ts --> | |||
| <!-- Th --> 1 | |||
| <!-- Ma --> | |||
| <!-- Op --> | |||
| <!-- Used --> | |||
| <!-- Provenance --> | |||
|- | |||
|class="itm" | [[Fallen_Ocelotepec_-_Treasure|Psychic Quartz Crystal]] | |||
|class="qty" | | |||
|class="ef" | | |||
| <!-- Bo--> | |||
| <!-- Ts --> | |||
| <!-- Th --> | |||
| <!-- Ma --> | |||
| <!-- Op --> 1 | |||
| <!-- Used --> | |||
| <!-- Provenance --> | |||
|- | |||
|class="itm" | [[Fallen_Ocelotepec_-_Treasure|Heavy Bronze Hand and a Half]] | |||
|class="qty" | | |||
|class="ef" | | |||
| <!-- Bo--> | |||
| <!-- Ts --> 1 | |||
| <!-- Th --> | |||
| <!-- Ma --> | |||
| <!-- Op --> | |||
| <!-- Used --> | |||
| <!-- Provenance --> Substantial Undead | |||
|- | |||
|class="itm" | [[Fallen_Ocelotepec_-_Treasure|Giant Flat_faced Club]] | |||
|class="qty" | 2 | |||
|class="ef" | | |||
| <!-- Bo--> | |||
| <!-- Ts --> 2 | |||
| <!-- Th --> | |||
| <!-- Ma --> | |||
| <!-- Op --> | |||
| <!-- Used --> | |||
| <!-- Provenance --> Nephilim Fight | |||
|- | |||
|class="itm" | [[Fallen_Ocelotepec_-_Treasure|Giant Crescent Spear]] | |||
|class="qty" | | |||
|class="ef" | | |||
| <!-- Bo--> | |||
| <!-- Ts --> 1 | |||
| <!-- Th --> | |||
| <!-- Ma --> | |||
| <!-- Op --> | |||
| <!-- Used --> | |||
| <!-- Provenance --> Nephilim Fight | |||
|- | |||
|class="itm" | [[Fallen_Ocelotepec_-_Treasure|Itemised Heavy Crossbow]] | |||
|class="qty" | | |||
|class="ef" | | |||
| <!-- Bo--> | |||
| <!-- Ts --> 1 | |||
| <!-- Th --> | |||
| <!-- Ma --> | |||
| <!-- Op --> | |||
| <!-- Used --> | |||
| <!-- Provenance --> | |||
|- | |||
|class="itm" | [[Fallen_Ocelotepec_-_Treasure|Eärendil's Trident]] | |||
|class="qty" | | |||
|class="ef" | | |||
| <!-- Bo--> | |||
| <!-- Ts --> | |||
| <!-- Th --> | |||
| <!-- Ma --> | |||
| <!-- Op --> 1 | |||
| <!-- Used --> | |||
| <!-- Provenance --> | |||
|- | |||
|class="itm" | [[Fallen_Ocelotepec_-_Treasure|Soul Reaver]] | |||
|class="qty" | | |||
|class="ef" | | |||
| <!-- Bo--> | |||
| <!-- Ts --> | |||
| <!-- Th --> 1 | |||
| <!-- Ma --> | |||
| <!-- Op --> | |||
| <!-- Used --> | |||
| <!-- Provenance --> | |||
|- | |||
|class="itm" | [[Fallen_Ocelotepec_-_Treasure|Blink Staff]] | |||
|class="qty" | | |class="qty" | | ||
|class="ef" | | |class="ef" | | ||
| <!-- Bo--> | | <!-- Bo--> | ||
| <!-- Ts --> | |||
| <!-- Th --> 1 | |||
| <!-- Ma --> | |||
| <!-- Op --> | |||
| <!-- Used --> | |||
| <!-- Provenance --> | |||
|- | |||
|class="itm" | [[Fallen_Ocelotepec_-_Treasure|Sister Six]] | |||
|class="qty" | 1 | |||
|class="ef" | | |||
| <!-- Bo--> 1 | |||
| <!-- Ts --> | | <!-- Ts --> | ||
| <!-- Th --> | | <!-- Th --> | ||
| <!-- Ma --> | | <!-- Ma --> | ||
| <!-- | | <!-- Op --> 1 | ||
| <!-- Used --> | |||
| <!-- Provenance --> | |||
|- | |||
|class="itm" | [[Fallen_Ocelotepec_-_Treasure|The Incubus Glaive]] | |||
|class="qty" | 1 | |||
|class="ef" | | |||
| <!-- Bo--> | |||
| <!-- Ts --> | |||
| <!-- Th --> | |||
| <!-- Ma --> 1 | |||
| <!-- Op --> | |||
| <!-- Used --> | |||
| <!-- Provenance --> | |||
|- | |||
|class="itm" | [[Fallen_Ocelotepec_-_Treasure|Large Bronze Shield]] | |||
|class="qty" | | |||
|class="ef" | | |||
| <!-- Bo--> 1 | |||
| <!-- Ts --> | |||
| <!-- Th --> | |||
| <!-- Ma --> | |||
| <!-- Op --> | |||
| <!-- Used --> | |||
| <!-- Provenance --> | |||
|- | |||
|class="itm" | [[Fallen_Ocelotepec_-_Treasure|Hummingbird Vestment]] | |||
|class="qty" | | |||
|class="ef" | | |||
| <!-- Bo--> 1 | |||
| <!-- Ts --> | |||
| <!-- Th --> | |||
| <!-- Ma --> | |||
| <!-- Op --> | |||
| <!-- Used --> | |||
| <!-- Provenance --> Gods house | |||
|- | |||
|class="itm" | [[Fallen_Ocelotepec_-_Treasure|Blood Pebble Armour]] | |||
|class="qty" | 30 pcs | |||
|class="ef" | in village | |||
| <!-- Bo--> | |||
| <!-- Ts --> | |||
| <!-- Th --> | |||
| <!-- Ma --> | |||
| <!-- Op --> | |||
| <!-- Used --> | |||
| <!-- Provenance --> | |||
|- | |||
|class="itm" | [[Fallen_Ocelotepec_-_Treasure|Itemised Large Steel Shield]] | |||
|class="qty" | | |||
|class="ef" | | |||
| <!-- Bo--> | |||
| <!-- Ts --> | |||
| <!-- Th --> 1 | |||
| <!-- Ma --> | |||
| <!-- Op --> | |||
| <!-- Used --> | |||
| <!-- Provenance --> | |||
|- | |||
|class="itm" | [[Fallen_Ocelotepec_-_Treasure|Itemised Winterthaw Shield]] | |||
|class="qty" | | |||
|class="ef" | | |||
| <!-- Bo--> | |||
| <!-- Ts --> | |||
| <!-- Th --> | |||
| <!-- Ma --> | |||
| <!-- Op --> 1 | |||
| <!-- Used --> | |||
| <!-- Provenance --> | |||
|- | |||
|class="itm" | [[Fallen_Ocelotepec_-_Treasure|Void Robes of the Qalamari]] | |||
|class="qty" | 4 | |||
|class="ef" | | |||
| <!-- Bo--> 1 | |||
| <!-- Ts --> | |||
| <!-- Th --> 1 | |||
| <!-- Ma --> 1 | |||
| <!-- Op --> 1 | |||
| <!-- Used --> | |||
| <!-- Provenance --> Qalamari fight | |||
|- | |||
|class="itm" | [[Fallen_Ocelotepec_-_Treasure|The Robes of the Damned Eibon]] | |||
|class="qty" | 1 | |||
|class="ef" | | |||
| <!-- Bo--> | |||
| <!-- Ts --> | |||
| <!-- Th --> | |||
| <!-- Ma --> | |||
| <!-- Op --> | |||
| <!-- Used --> | |||
| <!-- Provenance --> | |||
|- | |||
|class="itm" | [[Fallen_Ocelotepec_-_Treasure|Mechanical Eye]] | |||
|class="qty" | 1 | |||
|class="ef" | | |||
| <!-- Bo--> | |||
| <!-- Ts --> | |||
| <!-- Th --> | |||
| <!-- Ma --> | |||
| <!-- Op --> | |||
| <!-- Used --> | | <!-- Used --> | ||
| <!-- Provenance --> | | <!-- Provenance --> | ||
|- | |- | ||
|class="itm" | [[Fallen_Ocelotepec_-_Treasure| | |class="itm" | [[Fallen_Ocelotepec_-_Treasure|Greater Amulet of Amethyst]] | ||
|class="qty" | 1 | |||
|class="ef" | | |||
| <!-- Bo--> | |||
| <!-- Ts --> | |||
| <!-- Th --> | |||
| <!-- Ma --> | |||
| <!-- Op --> 1 | |||
| <!-- Used --> | |||
| <!-- Provenance --> | |||
|- | |||
|class="itm" | [[Fallen_Ocelotepec_-_Treasure|Greater Amulet of Beryl]] | |||
|class="qty" | 1 | |||
|class="ef" | | |||
| <!-- Bo--> | |||
| <!-- Ts --> | |||
| <!-- Th --> | |||
| <!-- Ma --> 1 | |||
| <!-- Op --> | |||
| <!-- Used --> | |||
| <!-- Provenance --> | |||
|- | |||
|class="itm" | [[Fallen_Ocelotepec_-_Treasure|Pearl Lip Pin]] | |||
|class="qty" | 2 | |||
|class="ef" | | |||
| <!-- Bo--> | |||
| <!-- Ts --> 1 | |||
| <!-- Th --> | |||
| <!-- Ma --> | |||
| <!-- Op --> 1 | |||
| <!-- Used --> | |||
| <!-- Provenance --> | |||
|- | |||
|class="itm" | [[Fallen_Ocelotepec_-_Treasure|Golden Eyebrow Bar]] | |||
|class="qty" | 1 | |||
|class="ef" | | |||
| <!-- Bo--> | |||
| <!-- Ts --> | |||
| <!-- Th --> 1 | |||
| <!-- Ma --> | |||
| <!-- Op --> | |||
| <!-- Used --> | |||
| <!-- Provenance --> | |||
|- | |||
|class="itm" | [[Fallen_Ocelotepec_-_Treasure|Jade Bracer of Fate]] | |||
|class="qty" | 1 | |||
|class="ef" | | |||
| <!-- Bo--> | |||
| <!-- Ts --> | |||
| <!-- Th --> 1 | |||
| <!-- Ma --> | |||
| <!-- Op --> | |||
| <!-- Used --> | |||
| <!-- Provenance --> | |||
|- | |||
|class="itm" | [[Fallen_Ocelotepec_-_Treasure|Crystal Skull Phial]] | |||
|class="qty" | | |||
|class="ef" | | |||
| <!-- Bo--> | |||
| <!-- Ts --> | |||
| <!-- Th --> | |||
| <!-- Ma --> | |||
| <!-- Op --> 1 | |||
| <!-- Used --> | |||
| <!-- Provenance --> Qalamari | |||
|- | |||
|class="itm" | [[Fallen_Ocelotepec_-_Treasure|Crystal Athame]] | |||
|class="qty" | | |||
|class="ef" | | |||
| <!-- Bo--> | |||
| <!-- Ts --> 1 | |||
| <!-- Th --> | |||
| <!-- Ma --> | |||
| <!-- Op --> | |||
| <!-- Used --> | |||
| <!-- Provenance --> Qalamari | |||
|- | |||
|class="itm" | [[Fallen_Ocelotepec_-_Treasure|Crystal Rod]] | |||
|class="qty" | | |||
|class="ef" | | |||
| <!-- Bo--> | |||
| <!-- Ts --> | |||
| <!-- Th --> | |||
| <!-- Ma --> 1 | |||
| <!-- Op --> | |||
| <!-- Used --> | |||
| <!-- Provenance --> Qalamari | |||
|- | |||
|class="itm" | [[Fallen_Ocelotepec_-_Treasure|Lilac Crystal]] | |||
|class="qty" | | |||
|class="ef" | | |||
| <!-- Bo--> | |||
| <!-- Ts --> | |||
| <!-- Th --> 1 | |||
| <!-- Ma --> | |||
| <!-- Op --> | |||
| <!-- Used --> | |||
| <!-- Provenance --> Qalamari | |||
|- | |||
|class="itm" | [[Fallen_Ocelotepec_-_Treasure|Baby Vellum Codex]] | |||
|class="qty" | 1 | |||
|class="ef" | | |||
| <!-- Bo--> | |||
| <!-- Ts --> | |||
| <!-- Th --> | |||
| <!-- Ma --> | |||
| <!-- Op --> | |||
| <!-- Used --> | |||
| <!-- Provenance --> Tower of Pain | |||
|- | |||
|class="itm" | [[Fallen_Ocelotepec_-_Treasure|Ring of Fangs]] | |||
|class="qty" | | |||
|class="ef" | | |||
| <!-- Bo--> | |||
| <!-- Ts --> | |||
| <!-- Th --> | |||
| <!-- Ma --> 1 | |||
| <!-- Op --> | |||
| <!-- Used --> | |||
| <!-- Provenance --> The Committee | |||
|- | |||
|class="itm" | [[Fallen_Ocelotepec_-_Treasure|Circlet of the Aethers]] | |||
|class="qty" | 1 | |||
|class="ef" | | |||
| <!-- Bo--> | |||
| <!-- Ts --> | |||
| <!-- Th --> 1 | |||
| <!-- Ma --> | |||
| <!-- Op --> | |||
| <!-- Used --> | |||
| <!-- Provenance --> | |||
|- | |||
|class="itm" | [[Fallen_Ocelotepec_-_Treasure|Narchuitl]] | |||
|class="qty" | 1 | |||
|class="ef" | | |||
| <!-- Bo--> | |||
| <!-- Ts --> | |||
| <!-- Th --> | |||
| <!-- Ma --> 1 | |||
| <!-- Op --> | |||
| <!-- Used --> | |||
| <!-- Provenance --> | |||
|- | |||
|class="itm" | [[Fallen_Ocelotepec_-_Treasure|Climbing Ring]] | |||
|class="qty" | 1 | |||
|class="ef" | | |||
| <!-- Bo--> | |||
| <!-- Ts --> | |||
| <!-- Th --> | |||
| <!-- Ma --> | |||
| <!-- Op --> 1 | |||
| <!-- Used --> | |||
| <!-- Provenance --> | |||
|- | |||
|class="itm" | [[Fallen_Ocelotepec_-_Treasure|Ring of Command]] | |||
|class="qty" | 1 | |||
|class="ef" | | |||
| <!-- Bo--> | |||
| <!-- Ts --> | |||
| <!-- Th --> | |||
| <!-- Ma --> | |||
| <!-- Op --> | |||
| <!-- Used --> | |||
| <!-- Provenance --> Tower of Pain | |||
|- | |||
|class="itm" | [[Fallen_Ocelotepec_-_Treasure|Ring of Spell Penetration]] | |||
|class="qty" | 1 | |||
|class="ef" | | |||
| <!-- Bo--> | |||
| <!-- Ts --> | |||
| <!-- Th --> | |||
| <!-- Ma --> | |||
| <!-- Op --> | |||
| <!-- Used --> | |||
| <!-- Provenance --> Tower of Pain | |||
|- | |||
|class="itm" | [[Fallen_Ocelotepec_-_Treasure|Serpentine Crown of Rain]] | |||
|class="qty" | | |class="qty" | | ||
|class="ef" | | |class="ef" | | ||
| Line 406: | Line 1,327: | ||
| <!-- Th --> | | <!-- Th --> | ||
| <!-- Ma --> | | <!-- Ma --> | ||
| <!-- | | <!-- Op --> 1 | ||
| <!-- Used --> | | <!-- Used --> | ||
| <!-- Provenance --> | | <!-- Provenance --> gods house | ||
|- | |||
|class="itm" | [[Fallen_Ocelotepec_-_Treasure|The Mask of Smoking Mirror]] | |||
|class="qty" | | |||
|class="ef" | | |||
| <!-- Bo--> | |||
| <!-- Ts --> 1 | |||
| <!-- Th --> | |||
| <!-- Ma --> | |||
| <!-- Op --> | |||
| <!-- Used --> | |||
| <!-- Provenance --> Gods house | |||
|- | |||
|class="itm" | [[Fallen_Ocelotepec_-_Treasure|Belt of the Qalamari]] | |||
|class="qty" | 3 | |||
|class="ef" | | |||
| <!-- Bo--> | |||
| <!-- Ts --> 1 | |||
| <!-- Th --> | |||
| <!-- Ma --> 1 | |||
| <!-- Op --> 1 | |||
| <!-- Used --> | |||
| <!-- Provenance --> Qalamari fight | |||
|- | |||
|class="itm" | [[Fallen_Ocelotepec_-_Treasure|Mechanical Bracer]] | |||
|class="qty" | | |||
|class="ef" | | |||
| <!-- Bo--> | |||
| <!-- Ts --> | |||
| <!-- Th --> 1 | |||
| <!-- Ma --> | |||
| <!-- Op --> | |||
| <!-- Used --> | |||
| <!-- Provenance --> the Committee | |||
|- | |||
|class="itm" | [[Fallen_Ocelotepec_-_Treasure|Fallen Akiriel]] | |||
|class="qty" | 1 | |||
|class="ef" | | |||
| <!-- Bo--> 1 | |||
| <!-- Ts --> | |||
| <!-- Th --> | |||
| <!-- Ma --> | |||
| <!-- Op --> | |||
| <!-- Used --> | |||
| <!-- Provenance --> | |||
|- | |||
|class="itm" | [[Fallen_Ocelotepec_-_Treasure|Burning Death]] | |||
|class="qty" | 1 | |||
|class="ef" | | |||
| <!-- Bo--> 1 | |||
| <!-- Ts --> | |||
| <!-- Th --> | |||
| <!-- Ma --> | |||
| <!-- Op --> | |||
| <!-- Used --> | |||
| <!-- Provenance --> | |||
|- | |||
|class="itm" | [[Fallen_Ocelotepec_-_Treasure|The Prisoner In Torment]] | |||
|class="qty" | 1 | |||
|class="ef" | | |||
| <!-- Bo--> | |||
| <!-- Ts --> | |||
| <!-- Th --> | |||
| <!-- Ma --> 1 | |||
| <!-- Op --> | |||
| <!-- Used --> | |||
| <!-- Provenance --> | |||
|- | |||
|class="itm" | [[Fallen_Ocelotepec_-_Treasure|Stillness]] | |||
|class="qty" | 1 | |||
|class="ef" | | |||
| <!-- Bo--> | |||
| <!-- Ts --> 1 | |||
| <!-- Th --> | |||
| <!-- Ma --> | |||
| <!-- Op --> | |||
| <!-- Used --> | |||
| <!-- Provenance --> | |||
|- | |||
|class="itm" | [[Fallen_Ocelotepec_-_Treasure|The Garotte]] | |||
|class="qty" | 1 | |||
|class="ef" | | |||
| <!-- Bo--> | |||
| <!-- Ts --> | |||
| <!-- Th --> 1 | |||
| <!-- Ma --> | |||
| <!-- Op --> | |||
| <!-- Used --> | |||
| <!-- Provenance --> | |||
|- | |||
|class="itm" | [[Fallen_Ocelotepec_-_Treasure|Forgotten Love]] | |||
|class="qty" | 1 | |||
|class="ef" | | |||
| <!-- Bo--> | |||
| <!-- Ts --> | |||
| <!-- Th --> 1 | |||
| <!-- Ma --> | |||
| <!-- Op --> | |||
| <!-- Used --> | |||
| <!-- Provenance --> | |||
|- | |||
|class="itm" | [[Fallen_Ocelotepec_-_Treasure|The Adorer]] | |||
|class="qty" | 1 | |||
|class="ef" | | |||
| <!-- Bo--> 1 | |||
| <!-- Ts --> | |||
| <!-- Th --> | |||
| <!-- Ma --> | |||
| <!-- Op --> | |||
| <!-- Used --> | |||
| <!-- Provenance --> | |||
|- | |||
|class="itm" | [[Fallen_Ocelotepec_-_Treasure|Red Stone]] | |||
|class="qty" | 1 | |||
|class="ef" | | |||
| <!-- Bo--> | |||
| <!-- Ts --> | |||
| <!-- Th --> | |||
| <!-- Ma --> 1 | |||
| <!-- Op --> | |||
| <!-- Used --> | |||
| <!-- Provenance --> | |||
|- | |||
|class="itm" | [[Fallen_Ocelotepec_-_Treasure|Incubus Thong]] | |||
|class="qty" | 1 | |||
|class="ef" | | |||
| <!-- Bo--> | |||
| <!-- Ts --> | |||
| <!-- Th --> | |||
| <!-- Ma --> 1 | |||
| <!-- Op --> | |||
| <!-- Used --> | |||
| <!-- Provenance --> | |||
|- | |||
|class="itm" | [[Fallen_Ocelotepec_-_Treasure|The Turban of Sharif Abou Ayyid]] | |||
|class="qty" | 1 | |||
|class="ef" | | |||
| <!-- Bo--> | |||
| <!-- Ts --> 1 | |||
| <!-- Th --> | |||
| <!-- Ma --> | |||
| <!-- Op --> | |||
| <!-- Used --> | |||
| <!-- Provenance --> | |||
|- | |||
|class="itm" | [[Fallen_Ocelotepec_-_Treasure|The Phial of Neferkare]] | |||
|class="qty" | 1 | |||
|class="ef" | | |||
| <!-- Bo--> | |||
| <!-- Ts --> | |||
| <!-- Th --> | |||
| <!-- Ma --> 1 | |||
| <!-- Op --> | |||
| <!-- Used --> | |||
| <!-- Provenance --> | |||
|- | |||
|class="itm" | [[Fallen_Ocelotepec_-_Treasure|Chrysoprase Frog]] | |||
|class="qty" | 1 | |||
|class="ef" | | |||
| <!-- Bo--> | |||
| <!-- Ts --> | |||
| <!-- Th --> | |||
| <!-- Ma --> | |||
| <!-- Op --> 1 | |||
| <!-- Used --> | |||
| <!-- Provenance --> | |||
|- | |||
|class="itm" | [[Fallen_Ocelotepec_-_Treasure|Bronze Viper]] | |||
|class="qty" | 1 | |||
|class="ef" | | |||
| <!-- Bo--> | |||
| <!-- Ts --> 1 | |||
| <!-- Th --> | |||
| <!-- Ma --> | |||
| <!-- Op --> | |||
| <!-- Used --> | |||
| <!-- Provenance --> | |||
|- | |||
|class="itm" | [[Fallen_Ocelotepec_-_Treasure|Cinderella Bells]] | |||
|class="qty" | | |||
|class="ef" | | |||
| <!-- Bo--> | |||
| <!-- Ts --> | |||
| <!-- Th --> | |||
| <!-- Ma --> | |||
| <!-- Op --> | |||
| <!-- Used --> | |||
| <!-- Provenance --> | |||
|- | |||
|class="itm" | [[Fallen_Ocelotepec_-_Treasure|x]] | |||
|class="qty" | | |||
|class="ef" | | |||
| <!-- Bo--> | |||
| <!-- Ts --> | |||
| <!-- Th --> | |||
| <!-- Ma --> | |||
| <!-- Op --> | |||
| <!-- Used --> | |||
| <!-- Provenance --> | |||
|- | |||
|class="itm" | [[Fallen_Ocelotepec_-_Treasure|x]] | |||
|class="qty" | | |||
|class="ef" | | |||
| <!-- Bo--> | |||
| <!-- Ts --> | |||
| <!-- Th --> | |||
| <!-- Ma --> | |||
| <!-- Op --> | |||
| <!-- Used --> | |||
| <!-- Provenance --> | |||
|- | |||
|class="itm" | [[Fallen_Ocelotepec_-_Treasure|x]] | |||
|class="qty" | | |||
|class="ef" | | |||
| <!-- Bo--> | |||
| <!-- Ts --> | |||
| <!-- Th --> | |||
| <!-- Ma --> | |||
| <!-- Op --> | |||
| <!-- Used --> | |||
| <!-- Provenance --> | |||
|- | |||
|class="itm" | [[Fallen_Ocelotepec_-_Treasure|x]] | |||
|class="qty" | | |||
|class="ef" | | |||
| <!-- Bo--> | |||
| <!-- Ts --> | |||
| <!-- Th --> | |||
| <!-- Ma --> | |||
| <!-- Op --> | |||
| <!-- Used --> | |||
| <!-- Provenance --> | |||
|- | |||
|class="itm" | [[Fallen_Ocelotepec_-_Treasure|x]] | |||
|class="qty" | | |||
|class="ef" | | |||
| <!-- Bo--> | |||
| <!-- Ts --> | |||
| <!-- Th --> | |||
| <!-- Ma --> | |||
| <!-- Op --> | |||
| <!-- Used --> | |||
| <!-- Provenance --> | |||
|- | |||
|class="itm" | [[Fallen_Ocelotepec_-_Treasure|x]] | |||
|class="qty" | | |||
|class="ef" | | |||
| <!-- Bo--> | |||
| <!-- Ts --> | |||
| <!-- Th --> | |||
| <!-- Ma --> | |||
| <!-- Op --> | |||
| <!-- Used --> | |||
| <!-- Provenance --> | |||
|- | |- | ||
|class="itm" | [[Fallen_Ocelotepec_-_Treasure| | |class="itm" | [[Fallen_Ocelotepec_-_Treasure|x]] | ||
|class="qty" | | |class="qty" | | ||
|class="ef" | | |class="ef" | | ||
| Line 417: | Line 1,591: | ||
| <!-- Th --> | | <!-- Th --> | ||
| <!-- Ma --> | | <!-- Ma --> | ||
| <!-- | | <!-- Op --> | ||
| <!-- Used --> | | <!-- Used --> | ||
| <!-- Provenance --> | | <!-- Provenance --> | ||
|- | |- | ||
|class="itm" | [[Fallen_Ocelotepec_-_Treasure| | |class="itm" | [[Fallen_Ocelotepec_-_Treasure|x]] | ||
|class="qty" | | |class="qty" | | ||
|class="ef" | | |class="ef" | | ||
| Line 428: | Line 1,602: | ||
| <!-- Th --> | | <!-- Th --> | ||
| <!-- Ma --> | | <!-- Ma --> | ||
| <!-- | | <!-- Op --> | ||
| <!-- Used --> | | <!-- Used --> | ||
| <!-- Provenance --> | | <!-- Provenance --> | ||
|- | |- | ||
|class="itm" | [[Fallen_Ocelotepec_-_Treasure| | |class="itm" | [[Fallen_Ocelotepec_-_Treasure|x]] | ||
|class="qty" | | |class="qty" | | ||
|class="ef" | | |class="ef" | | ||
| Line 439: | Line 1,613: | ||
| <!-- Th --> | | <!-- Th --> | ||
| <!-- Ma --> | | <!-- Ma --> | ||
| <!-- | | <!-- Op --> | ||
| <!-- Used --> | | <!-- Used --> | ||
| <!-- Provenance --> | | <!-- Provenance --> | ||
|- | |- | ||
|class="itm" | [[Fallen_Ocelotepec_-_Treasure| | |class="itm" | [[Fallen_Ocelotepec_-_Treasure|x]] | ||
|class="qty" | | |class="qty" | | ||
|class="ef" | | |class="ef" | | ||
| Line 450: | Line 1,624: | ||
| <!-- Th --> | | <!-- Th --> | ||
| <!-- Ma --> | | <!-- Ma --> | ||
| <!-- | | <!-- Op --> | ||
| <!-- Used --> | | <!-- Used --> | ||
| <!-- Provenance --> | | <!-- Provenance --> | ||
|- | |- | ||
|class="itm" | [[Fallen_Ocelotepec_-_Treasure| | |class="itm" | [[Fallen_Ocelotepec_-_Treasure|x]] | ||
|class="qty" | | |class="qty" | | ||
|class="ef" | | |class="ef" | | ||
| Line 461: | Line 1,635: | ||
| <!-- Th --> | | <!-- Th --> | ||
| <!-- Ma --> | | <!-- Ma --> | ||
| <!-- | | <!-- Op --> | ||
| <!-- Used --> | | <!-- Used --> | ||
| <!-- Provenance --> | | <!-- Provenance --> | ||
|- | |- | ||
|class="itm" | [[Fallen_Ocelotepec_-_Treasure| | |class="itm" | [[Fallen_Ocelotepec_-_Treasure|x]] | ||
|class="qty" | | |class="qty" | | ||
|class="ef" | | |class="ef" | | ||
| Line 472: | Line 1,646: | ||
| <!-- Th --> | | <!-- Th --> | ||
| <!-- Ma --> | | <!-- Ma --> | ||
| <!-- | | <!-- Op --> | ||
| <!-- Used --> | | <!-- Used --> | ||
| <!-- Provenance --> | | <!-- Provenance --> | ||
|- | |- | ||
|class="itm" | [[Fallen_Ocelotepec_-_Treasure| | |class="itm" | [[Fallen_Ocelotepec_-_Treasure|x]] | ||
|class="qty" | | |class="qty" | | ||
|class="ef" | | |class="ef" | | ||
| Line 483: | Line 1,657: | ||
| <!-- Th --> | | <!-- Th --> | ||
| <!-- Ma --> | | <!-- Ma --> | ||
| <!-- | | <!-- Op --> | ||
| <!-- Used --> | | <!-- Used --> | ||
| <!-- Provenance --> | | <!-- Provenance --> | ||
|- | |- | ||
|class="itm" | [[Fallen_Ocelotepec_-_Treasure| | |class="itm" | [[Fallen_Ocelotepec_-_Treasure|x]] | ||
|class="qty" | | |class="qty" | | ||
|class="ef" | | |class="ef" | | ||
| Line 494: | Line 1,668: | ||
| <!-- Th --> | | <!-- Th --> | ||
| <!-- Ma --> | | <!-- Ma --> | ||
| <!-- | | <!-- Op --> | ||
| <!-- Used --> | | <!-- Used --> | ||
| <!-- Provenance --> | | <!-- Provenance --> | ||
|- | |- | ||
|} | |} | ||
<br/> | <br/> | ||
== Calendar == | === Calendar === | ||
{| cellspacing=1 width="100%" border=0 class="Season" id="Winter" | {| cellspacing=1 width="100%" border=0 class="Season" id="Winter" | ||
! colspan=15 | '''Winter: [[Frost]] 817 (7)''' | ! colspan=15 | '''Winter: [[Frost]] 817 (7)''' | ||
| Line 525: | Line 1,699: | ||
| class="calMoon" | [[Image:moon3.jpg]] | | class="calMoon" | [[Image:moon3.jpg]] | ||
| class=day | 7 || Astral Travel D6 | | class=day | 7 || Astral Travel D6 | ||
| class=day | 8 || Astral Travel D7 | | class=day | 8 || Astral Travel D7 | ||
| class=day | 9 || | | class=day | 9 || Astral Travel D8 | ||
| class=day | 10 || | | class=day | 10 || Astral Travel D9 | ||
| class=day | 11 || | | class=day | 11 || Astral Travel D10 | ||
| class=day | 12 || | | class=day | 12 || Astral Travel D11 | ||
| class=day | 13 || | | class=day | 13 || Astral Travel D12 | ||
|- | |- | ||
| class="calMoon" | [[Image:moon0.jpg]] | | class="calMoon" | [[Image:moon0.jpg]] | ||
| class=day | 14 || | | class=day | 14 || Astral Travel D13 | ||
| class=day | 15 || | | class=day | 15 || Astral Travel D14. Arrive Trondheim and get equipped | ||
| class=day | 16 || | | class=day | 16 || Ignore travel across to target location and sleep there | ||
| class=day | 17 || | | class=day | 17 || Day travelling SW down coast 400m | ||
| class=day | 18 || | | class=day | 18 || Day travelling WSW down towards target area over the Sierra Madre. Arrive at location. Investigate. Encounter Wormskulls. | ||
| class=day | 19 || | | class=day | 19 || Fight [[Blackrod]], go into the Catacombs and then out | ||
| class=day | 20 || | | class=day | 20 || The adoratorium and checking out southern reaches. MF Fight. Meet 'Daisy' | ||
|- | |- | ||
| class="calMoon" | [[Image:moon1.jpg]] | | class="calMoon" | [[Image:moon1.jpg]] | ||
| class=day | 21 || | | class=day | 21 || Back into the Ruins. Bat cave battle. 'Committee' battle. Flee Queenie and Slaad. Fight Blackrod on route and kill him. Rtn to heal. Rtn up the hill in late afternoon - encounter B-rod. Rtn to heal. stay night. | ||
| class=day | 22 || | | class=day | 22 || Afternoon sees us return to the ruins. We fight many foes inc the Deceivers, Bulgwatha and the worm where we get the bat mask. We return to lower Ocelotopec late afternoon. | ||
| class=day | 23 || | | class=day | 23 || Remain in Lower Ocelotopec for R&R and itemry work. | ||
| class=day | 24 || | | class=day | 24 || Remain in Lower Ocelotopec for R&R and itemry work. | ||
| class=day | 25 || | | class=day | 25 || Remain in Lower Ocelotopec for R&R and itemry work. | ||
| class=day | 26 || | | class=day | 26 || Remain in Lower Ocelotopec for R&R and itemry work. | ||
| class=day | 27 || | | class=day | 27 || Remain in Lower Ocelotopec for R&R and itemry work. | ||
|- | |- | ||
| class="calMoon" | [[Image:moon2.jpg]] | | class="calMoon" | [[Image:moon2.jpg]] | ||
| class=day | 28 || | | class=day | 28 || Depart and travel via Astral to Bishops | ||
| class=day | 29 || | | class=day | 29 || D1 Depart Bishops to travel Home | ||
| class=day | 30 || | | class=day | 30 || D2 Depart Bishops to travel Home | ||
| class=day | 1 || | | class=day | 1 || D3 Depart Bishops to travel Home | ||
| class=day | 2 || | | class=day | 2 || D4 Depart Bishops to travel Home | ||
| class=day | 3 || | | class=day | 3 || D5 Depart Bishops to travel Home | ||
| class=day | 4 || | | class=day | 4 || D6 Depart Bishops to travel Home | ||
|- | |- | ||
! colspan=15 | '''Winter: [[Snow]] 817 (8)''' | ! colspan=15 | '''Winter: [[Snow]] 817 (8)''' | ||
|- | |- | ||
| class="calMoon" | [[Image:moon3.jpg]] | | class="calMoon" | [[Image:moon3.jpg]] | ||
| class=day | 5 || | | class=day | 5 || D7 Depart Bishops to travel Home | ||
| class=day | 6 || | | class=day | 6 || D8 Depart Bishops to travel Home | ||
| class=day | 7 || | | class=day | 7 || D9 Depart Bishops to travel Home | ||
| class=day | 8 || | | class=day | 8 || D10 Depart Bishops to travel Home | ||
| class=day | 9 || | | class=day | 9 || D11 Depart Bishops to travel Home | ||
| class=day | 10 || | | class=day | 10 || D12 Depart Bishops to travel Home | ||
| class=day | 11 || | | class=day | 11 || D13 Depart Bishops to travel Home. Arrive back in seagate | ||
|- | |- | ||
| class="calMoon" | [[Image:moon0.jpg]] | | class="calMoon" | [[Image:moon0.jpg]] | ||
Latest revision as of 23:17, 10 February 2024
Summary
Adventure: Fallen Ocelotepec
GM: Jim Arona
Season: Winter 817 wk
Night: Tuesday
Location: Chez Caulfield
Level: Medium
- Party
- Boris Michael Haycock 00
- Mario - Dean 05
- Thaeuss - Stephen 33
- Tsayoi by Chris c 73
- Ophelia by Mike O
- Employer

- The Most Reverend Gudbrand, Bishop of Trondheim O.S.B
- Mission
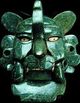
The Mask of the Bat God - His Excellency would like to hire a worthy party of adventurers to travel across the eastern waters and recover from Ocelotepec the 11 inch x 8 inch mask of the bat god.This is expected to weigh 5 1/4 lbs. He offers 10,000sp and salvage, except for the mask, of course. He can provide 6 whitethorn withes Alchemically hardened into stakes and a small caddy of Marist rosehip tea and a few other things.
- He would prefer to employ at least one conjuror of nethermantic magic and similarly a competent distiller of miraculous brandy. An experienced navigator might be bloody handy, too, depending on how you want to go about things, but he leaves these details to the adventurers, who know best. Also, a Ranger whose terrain specialisation is rain forest or jungle. And an "archaeologist" might be handy, too. But hey, if you believe an Artisan animal husbander and perfumer might be critical to the success of the mission, who is he to demur?
- Nevertheless, the funds will be lodged with the Adventurer's Guild in escrow under the hand of Kali the Nameless, who will interview the adventurers upon their return.
- With extreme prejudice.

Guild Meeting - Meet the Bishop, party introductions and planning, organise some supplies from associates. Also some very warm clothing for the expected cold
We start our travel onwards to Trondheim on the plane of Nualis with the Bishop. Hold more discussions on-route.
We learn that Mask of the Bat God has the power to bring things to life which is a most sought after item indeed. It isn't known why the item was there or why its been left there until now but now is the time to recover it and bring it safely to the Bishop for safe keeping. We learn that the city of Ocelotopec in a realm known as Oaxaca is also known as the hill of the ocelot (aka Jaguars) and that the creatures are known to be around the target location. The city was once well populated but something happened and the 'people' there now live mainly nearby on a piece of land in the fork of a nearby river.
Since we are informed that time is of the essence (or will soon be) we decide to expedite travel across the world to an area of the plane which involves much distance either across land or sea of several thousand miles and many days travel.
Arrive at Trondheim.
We use an Ignore Distance potion and various magics to enable Tsayoi to walk south from Trondheim to warmer waters in the south' in a matter of minutes and then swim the ocean through to a jungle peninsula in around an hour. The end of our travels sees us in the area of a jungle where we pause to get our bearings in heavily overgrown rain forest.
Arrive in Central Terranova area
We travel a few miles north until we get to the coast where we take carpet and travel SW down the coastline some 400m until we end our days travel. Camp. We become familiar with fruit and the nasty insect life hereabouts. Night passes.
We travel some more and end our travels at a small coastal village (we call this Emerald-by-the Sea) of around 100 families. During the days we'd seen a huge swarm of butterflies (perhaps The Lord of Swarms?) which we chose to hide from. The locals aren't surprised to see people (adventurer types) here and Thaeuss trades some conjured metal items for emeralds. We spend the night in a nearby meadow after a bone circle is established along with a dream locus. Night passes.
The next day we travel onwards WSW and cross some mountain ranges and end up at our destination which is a valley with 4 'fingers' pointing southwards and which has an abandoned city on a 800m tall hill above a palisaded town at the intersection of 2 valleys. We'll call the high abandoned city 'Ocelotopec A' and the town below Ocelotopec B' for reference purposes.

We go for Oceolotepec A and land to the south on the eastern side before heading in (mostly by foot except for Thaeuss who doesn't care to walk and instead floats on his carpet) to explore the area.
We enter the bounds of the city near the pyramid and we actually cross a boundary between realms which takes 15 seconds to enter but 90 seconds to leave. We hesitantly enter and find a much larger area than we can outside, which may be an effect of the 3 realms connecting here (but hey, I'm no philosopher) or some other effect. We locate and destroy one of the substantial undead (PoO unknown) and are then engaged by a wormskull which we manage to beat off while we attempt to flee. The wormskull summons two friends and we are hard pressed to get away until we use the Black King to write a world law (making a gateway into the Astral) and enable us to target one which ends up disintegrated. The other two wormskulls don't harass us while we flee across the boundary.
We decide to go down to Ocelotopec B and find interesting folk there, a thriving community with a significant number of adventurer types (inc humans, orcs, hobgoblins, blood elves and more) who spend their time going up to Ocelotopec A, looting and then running away with whatever they can. We meet the spokesman for the adventurers Tondrac and we learn the town has a talismonger, a nethermancer, a gnome jeweller/binder, an apothecary and more. We find out that the mercenaries are here by accident and have been for circa 3-5 years after they managed to find their way into Ocelotopec A and thus 'fell through' to Nualis. We spend the day talking and divining what we're allowed to see/touch and then night in the town. We are told to expect scarecrows, mind flayers, liches, elder brains and much more. A bone circle and dream locus are established for future movements. Night passes.
The next day we go back up to Ocelotopec A and enter from the North of the ruins. There we create another bone circle and then move inwards. We quickly encounter a mist rolling towards us which covers around 2 dozen scarecrows and a nasty rune mage & his imp familiar. The battle was difficult and the rune mage managed to stymie our counter-attack with his nasty spells (Torment is very nasty) and use of his evil magics like hand of glory etc. We finally survived the onslaught and attempted to take down the rune mage but he ported away - much to my disgust - but his head is mine when next we see him.
We next set about looking for loot and ..
Boris detects catacombs on the cardinal points with the Southern and Eastern being dangerous, the northern 'very dangerous' and the western 'bloody dangerous' and so the northern catacombs become our target. We move through streets, one of which looks mostly intact until inside we note that the walls seem to have been almost clawed away by a being of great strength. We move towards a large pyramidal structure which looks promising but we decide to look around its base for a way into the catacombs/tombs. We find an undisturbed house with a solid door and decide to investigate. A while later we're inside the house (seems to be the catacombs curator's residence - he would appear to have been only 4ft tall or so) once we've got past the insanely trapped (rank 9) door and we search for a way down. Mario settles on the toilet for the privacy aspect involved and successfully locates and disables a horrible explosion trap which then reveals steep stairs going down. We descend the stairs and again avoid another hideous trap to get to the bottom.
At the bottom we start moving through the catacombs when we hear movement behind us - and it doesn't seem friendly. So a wall is raised behind us to protect us and we peer through only to see a swarm (thousands of thousands) of frogs and a dark figure as well. We decide to continue forward into the undead realm rather than face the frogs and master. We suspect The Lord of Swarms again!
Into the Catacombs

We enter the catacombs proper through sturdy stone doors. We can see a mummy sitting on a central throne in the cavern (some 800ft across) and are then assailed by paired-wraiths. We start to make way and our lessor known front-line binder makes his presence felt in a forking fine way. I with my Holy Sword and Mario with his various weapons combine to take out the wraiths at a pace before they resort to lashing us with damage spells. The enemy are closing...
Still in the darkness of death rooms
We through concerted action take down the wraiths until only the mummy and her 2 lieutenants remain. Mario has competition when the drake appears and comes to our aid (or rather us to his once he fails to resist her charms) somewhat. The remaining enemy have caused a celestial barrier around them and we are hard pressed to enter. Boris does but becomes enamoured of the mummy and starts gifting her his precious items. We see this and attempt to aid him (or rather to destroy her) and through powerful magic we take down the barrier and despatch them all. She isn't completely dead and so we track her fleeing soul and destroy what we can. We then take stock and loot the area (including canopic jars) before looking to flee elsewhere - perhaps the surface away from the mind flayers nearby. We go back to previously passed rooms and search for an exit. We find a doorway made from a Lurker (an elder creature who has no concept of 'death') who offers to allow us passage down...
Try to find a way out of this nasty place
We searched for alternate ways out of the complex that didn't involve Mind Flayers, a swarm of frogs or a suspect lurker portal. We discussed this with our new companion and he recommended we leave the way he entered and so we went back through the big chamber to an alternate egress and departed the catacombs - avoiding the mudslide and rickety wooden area. We did manage to locate some expensive gems on our way out.
On the way, out we detected an entity called 'The Committee' which is a collection of 7 'minds' attached to a single entity - we choose to avoid this entity.
We exited in an area with little houses and a whole lot of devastation. We discern we're on a plane named Haven and we're concerned. We examine an area of 9 houses which had been destroyed by very intense fire. After investigation, we discover that the Dragon Charcolgrin had destroyed the homes as they contained crystal entities which are a type of horror. We also find a scale of Chalcolgrin and determine his POO is Haven and he's an Elemental Dragon, around some 70ft in length. We further investigate nearby and determine Chalcolgrin and the Black man aka Buwalgatha (a named horror) fought a battle nearby which changed Chalcolgrin from being a multicoloured (red/green/blue) spined dragon to being one with blackened scales.
We choose not to dilly-dally and apart from a cursory look at an Adoratorium we depart to the east and exit the strange area, heading down to lower Ocelotopec of Ocelotopec A.
We discover that it's still the afternoon of the day we left (the 12th), however the eclipse is now only 10 days away.
We go and see the locals to find out information. We see Avenging Claw and discover that the Rune mage we encountered is no other than Blackrod and he appears to add Greater Summoner to his list of abilities. We also buy some new good from AC, namely a desperate charm for Tsayoi, a 'Horror Fend' for Mario, 3 'Death Cheat' for Tsayoi and 2 'Absorb Blows' for Tsayoi. These seem the items that we'd likely need in a pinch. We also ensure we're disease free before retiring for the night. Night passes.
The next day we go back up and enter Upper Ocelotopec or Ocelotopec B at the point we exited yesterday. We go to the Adoratorium and go to quickly check it out when we discover that it is a dark sphere which has been peeled back from the inside. We do an experiment and using a Rag and String Golem to see where the center of the sphere is hoping to find out where it goes. The Golem gets possessed by a spirit named Kerastes and so Mario binds his will to control him. We still wonder how to get at the center of the sphere ....
A dangerous encounter
We look around a bit longer but decide that its a bit dangerous here so we decide to move on and head south to where we consider the mask and more to be located. 'Before we do we go north to check out the magical bricks but they're covered in goop and hard to locate without significant damage to us! We investigate the Southern Temple and its 'god house' and loot some items there and then take them outside to divine them. We then partake in some lunch and after divying up the items we enter once more. We go to the other southern structure and discover several substantial undead (giant sized Nephalim) which we engage and manage to defeat with a whole lot of trouble.
We search, encounter a Beholder and plan to kill some Ithilids
We search, loot and then Boris animates the three bodies as they might be helpful. We look above and discover a beholder on the next level with its eyes out on the approach vectors which means serious issues/death for us so we plan to be cunning. Eventually we come up with a plan which involves making a small hole into its 'lair' and then stuff some magical material into its mouth unexpectedly which turns it into an egg which we catch. The plan works flawlessly and we find ourselves possessing a beholder egg - which we decide would be the ideal present for the Ithilids nearby.
So we return via the curates lodgings down to the mummy's catacombs where we espy the Ithilids on purpose. We discover that the Ithilids are in fact upon one of their ships transiting the void and that the fulcrum between the planes is upon it - most unusual. We also note the presence of 4 'torpedo' rooms containing 15 frozen 'Aliens' which we hatch a plan to use to destroy their Ithilid captors. Using our magic we break down the ice around the aliens and then cast mind counter-spells upon them to make them resist the Ithilid control magic. We do this successfully for the 2 forward torpedo rooms but when we try to repeat the trick at the rear room the Ithilids are ready and initiate counter boarding measures. They (6 of them) are counter-boarding us and things are about to get interesting.
We battle the Ithilids, meet Daisy, rest and go bat shit
So, battle was joined with the Mind Flayers. We managed to kill them all except one who fled back to the safety of his ship. We decided not to follow once we saw flames in the room below and we suspected the Balrog had got loose and that the Ithilids might be preoccupied - muwahaha! It couldn't happen to a nicer bunch of squid faces!
Anyway, we noticed a newcomer near us who had been aiding us during the fight. We introduced ourselves and met an elven mind mage named 'Daisy' who was keen to join us and get out of here. Together we departed the ruins, did divinations and then descended into Ocelotopec B where we undertook trading of loot (killed the Beholder and sold the parts), got a bonus SD grenado , purchasing gems (we sold off 16,075sp in the low value gems we already had and bought the following 2 Emeralds of 3,000sp and one of 5,000sp, a large Onyx 6,000sp, a diamond 4,000sp and a ruby 7,000sp - a total of 28,000sp less our trade-ins!) and rested the night. Night passes.
We go back up to the ruins in the morning, enter from the SE and go to the lower room on the pyramid we'd been looking around and which had bats in it as we considered that the bat god mask might be there. Its full of bat shit and we have to destroy a whole big enough to crawl through to gain entry. Once Boris is in, I'm almost through and the rest of party lined up to come in when the bats mobilise...
Battle of the bats and an important release
We battle the huge bat and the multitude of small bats and finally manage to destroy her which turns out for teh best as she was a captive bat goddess Itzpapalotl (aka Obsidian Butterfly) who had been bound here by an enemy and who could only be freed through death. She was grateful and she rewards us with lessor wishes and tells us where to locate the Mask of the Bat God. It's not in a good place and is in fact in a nexus of planes. We decide to go get it and set off down into the mummy area again. We come across 'the Committee' and a battle ensues but we prevail and looting occurs. We plan continue onwards towards the nexus area.
Horror Annihilation - encounter Queenie and a Grey Slaad and then a lucky encounter with Blackrod
We spend time annihilating the horror that is the Committee and then move inwards. We go through areas of darkness and find areas laced with trips made by Blackrod and his minions. We find a trap/ambush room occupied by the Incubus and Succubus but we turn the tables on them and anti-ambush them killing both (for now) and we loot and move on.
A little further in we come across a horde of frogs and we decide on a strategic retreat elsewhere in the complex away from there. Things go from bad to worse when I glance into the void and see a Grey Slaad (the epicentre of the frog swarms) and Queen Xiombarg coming towards us and I'm physically impacted (in a bad way), so at half speed. Strategic retreat turns to fleeing by carpet and we expeditiously travel down the corridors with the sounds of Queenie and the Slug following us.
In our flight we come across Blackrod from behind who seems to also be fleeing Queenie and the Slug and we quickly despatch him but allow his minion to flee in exchange for information and his itemry being left behind.
We get to the mudslide and get up there quickly followed and through great use of magic we relieve Queenie of her sword and get up to the little boxes area from where we activate the bone circle to move quickly to the north and then out of the magical barrier - around noon.
Back to Safety and then Blackrod comes seeking revenge
We spend 2 hours until 2pm resting and dropping off material with Poppy/Daisy and then we head back up the hill towards the ruins, even if Tsayoi isn't fully recovered and with Poppy/Daisy who needs a rest it seems.
Half way up the hill we encounter Blackrod's ambush involving him, a Shrike, A bone Lord, his demonic minions and other allies. We are hard pressed until I let loose the Charm of Justice which levels the field so much that Blackrod flees the field. We loot more and then since we are even more damaged we return the village.
Onwards and upwards into danger
We head back up the hill the following afternoon and we make it inside the complex without much trouble. We trace our way slowly back inside and almost get to the centre of the complex. In a crowded corridor outside the nexus we get attacked from the rear by Blackrod and co whilst simultaneously being attacked by a multitude (30) of enveloping nasty shadows from the front. B-rod flees when we once again almost knock him down while i used D-Flames to incinerate the shadows who turned out to be only 6 in number but with multiple images. We pause and then think to enter the nexus ..
Into the Nexus
We enter and find a corridor followed by a huge almost cathedral like area which is covered in an empathy net effect (this tells those who look at it that its a source of their deepest dreamed treasures) and is the place where we're attacked by a Grack monster (stone scaled flat planed horror) and 210 jackals from a free sending. The Grack was frustrating as I kept hurting myself when it banded damage to me but we finally killed it due to team work and then we dealt with the jackals by scything through them with great results while the immolation burning helped a lot. We then moved on and travelled along a weird pathway, up a chasm and onto a path upon which was a H shaped tower from which emanated pain. We gained entry through skills, managed to kill 2 of the 6 main denizens before a purple worm caused us to become noticed. We managed to MA the worm who we named 'Prince' and a brief pause ensues. We then noticed the other 4 nasties coming for us. We gird our loins once more.
The Tower of Terror and Pain
We have a hard fight but finally kill the evil deceiver elves. Unfortunately they blow the tower up when they die and we only get to loot a small amount before wondering where to from here. We do get a small saucer which falls from the roof with some interesting contents
Too many black men and paths
We loot the saucer of what we can and then send the damaged cargo onto a safer place so that we can take them with us rather than leaving them to their nasty fates. We move on, back to where we think we're on track to our destination. We take to the carpet to cross the chasm and see a black figure nearby (who we assume is Blackrod) and we decide to kill him once and for all. We are unpleasantly surprised when he fire-arc's onto the carpet and almost kills Thaeuss in one flurry of blows (he had 6 limbs and was very nasty) and crashes the carpet in the chasm below due to his added weight which injures most of the party.
It turns out that this is Buwalagatha and we're in the fight of our lives. He grabs Thaeuss's almost dead body and Fire-arc's away to drink potions to make him tougher. We tremble and then move to react. He gets down amongst the party and kills Ophelia in less than half her actions and moves to engage Boris. I heal Thaeuss and spells are cast to little avail. This could be the death of us. We fight a holding action for 2 more pulses while we ready to act. We finally enact a 'hail-mary' plan and pull it off whereby I destroy an artefact called Dipole causing a huge amount of damage to him killing him outright. We pause for breath. We loot him of items, body parts, head etc and itemise what we don't cut up for later examination.
We follow the path and come out of an apparent cliff face to a starlight lit earthen tree festooned grove with chips of jasper and many paths through the area. I take a golden mistletoe cutting and some mistletoe too. We look around and choose a path to the left.
We enter a long avenue from a bush (which we mark) and we proceed towards a large stepped pyramid/temple ahead. We get there and find in its centre a small hut and trapped stairs descending to a lower room designed for entombment and enraging corner dogs as it's all curved. It was designed to call/hold Anak - a Cthonic demon who represents a time paradox around planar creation and involved a Glyph of Revelation which we noted.
We go back to the top of the temple pyramid and look around. We are in the centre of a 4 way junction. We came here from the south.
We go north and after a while transition across a boundary and find ourselves on a floating plane of rocks - POO Circus Maximus. We see a he well of darkness and floating nearby stars. We lunch here and recover a bit for 3 hours before moving on once items replenished.
We return and go west and we find ourselves in a mountainous area POO Haven. We look around some and see a village which we head towards. We encounter a small black man in robes who is a watcher. We talk with him and he's Armin the Turk and he tells us to go back to the temple and the object of our quest is inside a huge worm down the eastern path.
We also discover that Thaeuss's golem has been possessed by an entity from Victoria named Jerus (aka Jack) who was/is a murderer by trade. We then disintegrated him to render him dead once more - hopefully worse.
We head back towards the temple 'Nexus' and our final objective - still wary of it all.
And finally
We head East
Places
- Nualis - A map of the central part of Nualis Nualis
- Ocelotopec A. This is a set of ruins elevated above the valley floor by around 800m. This is a 800m long (N-S) and 300m wide (W-E) level plateau on top of a hill.
- Ocelotopec B. This is a town situated on the valley floor below Upper Ocelotopec and set at alongside a small river (10m wide) and surrounded by a sturdy palisade. The area is some 1500m above sea level and the village is home to around 1200 families.
People, creatures or entities encountered
- Bishop of Trondheim in Trondheim
- 'The Black Man' aka Buwalagatha, a named hooror of immense power. He has a string carapace, 7 limbs inc one from down below, is a mercenary assassin/tracker for hire to the evil ones in the abyss/void and has a number of innate abilities.
- Blackrod. We discover he's been here and it appears that he's also looking for the mask. He hangs out with an Incubus and Succubus and an undead giant hawk.
- Itzpapalotl (aka Obsidian Butterfly), a bat goddess. A nice sort if you help her out!
- Charcoalgrin. He is a great Dragon. POO is Haven and he's an Elemental Dragon, around some 70ft in length. a multicoloured (red/green/blue) spined dragon to being one with blackened scales
- Qalamari aka Ithilids aka Mind Flayers aka Calamar
- Grack
- Wormskulls, cross dimensional creatures
- Beholder, eyes to die for
- Substantial Undead, nasty and strong.
- 'The Committee'. a collection of 7 'minds' attached to a single entity
- Scarecrows, inflammatory entities with strength and single minded purpose.
- The Grey Slaad, a nasty frog like creature with suckers for hands and a swarm of frogs at its webbed tips!
- Queen Xiombarg, aka the Queen of Swords, Xiombarg, a power of Chaos recently removed from one of her realms and trying to hold off her brother, Mabelode (also a power of Chaos) from invading her holdings, while she works at recovering and extending her dominion into those dimensions currently ruled the powers of Order, most notably Kalvos.
- Sethrak of the Bells.
- Sethrak is a T'skrang who is a Rank 7 Troubadour. He is 5'9" tall, and has a tail which is 4' 6" long. His top scales are a deep emerald green and his crest and belly scales are a warm, virginal pink. He wears a royal blue frock coat with red piping, a pale green silk shirt with ruffles, a dark brown leather bandolier holding three potion phials, three darts and a heavy crystal parrying dagger, and a broad leather belt with a large brass buckle on which his basket-hilted bronze broadsword hangs. His tail has been weaponised with a ringing bell of bludgeoning. He is dressed from waist to just below the knee in a tight, black taleguilla made from soft leather.
- Abilities
- Sethrak collects song and stories from this world and others. He may ring out in song in such a way that may help an audience come to terms with any trauma or horror that has been visited upon them.
- He is able to sense people he knows by the pattern of their emotions.
- Once a day, resetting at breakfast, Sethrak may take his leave of an encounter unfollowed and unmolested for 4 Pulses by uttering a few charming phrases. To succeed in this, he must roll higher than the Active Magic Resistance of those he wishes to take his leave of by percentile dice and adding his WP + 8 (Break Active MR => WP + 8). A part of this magic is acknowledging the targets of this Graceful Exit, so it may not be attempted against people he cannot see or is unaware of. If the roll is not high enough to affect all of his targets, those unaffected will increase the Rank of their weapons or attack magic by 2 against him (but him alone. This does not increase multi-target abilities.) even if this would take them beyond maximum Rank. If Sethrak should return to the encounter within 24 hours, all of his previous targets increase their Ranks versus him by 2.
- Movement Rates
- Running / Swimming: 250/200
| PS: | 19 | MD: | 22 | AG: | 24 | MA: | 13 | EN: | 18 | FT: | 23 |
|---|---|---|---|---|---|---|---|---|---|---|---|
| WP: | 24 | PC: | 17 | PB: | 18 | TMR: | 7/4 | NA: | Scales absorb 4 | ||
- Weapons
- Broadsword: SC 114%, 2 rollup D10 + 2, Melee, B Class damage, Rank 7
- Crystal Parrying Dagger: SC 116%, [1 rollup D10 + 2], Melee & Close, A Class damage, Rank 10
- Ringing Bell: SC 112%, 2 rollup D10, Melee, C Class damage, Rank 6
- The pommel stone of the broadsword is an enormous catseye. On a D10 roll that is a prime number, Sethrak can see behind him, meaning bonuses that normally apply for rear attacks are ignored. Additionally, if successful, he can strike into his rear hex with the bell, and this is a Free Act. If the bell strikes a summonable entity or construct, damage increases to 3 rollup D10.
- Defence: 56, 42 vs thrown & missile attacks, but may avoid a blow once per Pulse by Breaking 100 => AG + 8, MR: 51%, 67% versus magic that attacks the personality (Charm, Fear, Compelling Obedience ,etc). His frock coat provides 6 points of spell armour.
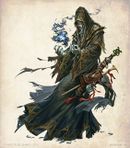
Avenging Claw - 'Avenging Claw', a nethermancer based in Ocelotopec B: a blood elf with very spiky thorns about his person. He is here to deal with an anticipated danger from a "black man" to his blood queen. His date name is 7 Flower. His spell rack holds 7 matrices.

Avenging Claw can cast a spell (at a cost of 350sp) which increases how much an entity recovers as a function of natural healing. The spell lasts for a maximum of 16 days, and when natural healing occurs, the value is increased by 15 points.
- A hobgoblin who runs an Apothecary.
Wares from the Apothecary
Silver Death Grenado
This hollow glass grenado has two chambers. The one at the bottom contains a 1/2 lb collection of dark grey metal beads the size of match heads. The other chamber contains water. It weighs 3 lbs in total. When it is broken, the water reacts with the metal which burns silver, shattering the heavy glass which will generate 2 Specific Grievous injuries from flying glass shards. The wet metals beads will be distributed over a megahex volume and inflict 3 rollup D10 corrosive damage.
750sp value
Potion of Astral Sight
This phial weighs 1/4 lb and must be Prepared before it can be consumed. It allows a character to see into the astral plane for 7 minutes to a range of 165 feet. The potion allows the drinker to make an Astral Sight test by rolling percentile dice and adding their MA + PC at a cost of 1 point of Strain. If the result is greater than 30, they can see into the plane. Subsequent attempts can be made in the hopes of generating a better test result, each costing a point of Strain. Any entities lurking in the astral whose Active Magic Resistance is less than or equal to the test result will be detected. Invisible entities will only be detected if the Rank of the spell is less than 11.
Rank 10, 2,500sp
Healing Sleep Draughts
This phial weighs 1/4 oz and must be Prepared before it can be consumed. It contains a standard Healing Sleep Draught.
Rank 2 - 7 available, 50sp per Rank
- A human talismonger. He has a range of talisman, amulets and such.
Wares from the Talismonger
Blood Amulet of Three
This amulet is a tiny crystal phial an inch long and half an inch around. It weighs 2 oz. It must be pinned on the chest just below the left shoulder.
If the wearer receives a Specific Grievous Injury to the left shoulder or chest, then they must Break 100 + 30 to avoid the destroying the charm.
A little of the wearer's blood must be poured into the phial costing three points of FT, which the wearer may not recover until the amulet is used. When the amulet is used, requiring a Free Act, the wearer' rolls 2 D10 in the place of %ile dice checks and discards the low result. The high result is taken to be the "1"s value, the "10"s value automatically being 0 while the effect lasts, which is for three Pulses.
This amulet may only be filled on an equinox or solstice.
12,000sp
Blood Amulet of the Chalice
This amulet is a carved out of soapstone in the shape of a chalice about half an inch in diameter. It weighs 2 oz. It must be pinned on the inside of the left forearm.
If the wearer receives a Specific Grievous Injury to the left arm or hand, then they must Break 100 + 40 to avoid the charm being destroyed.
A little of the wearer's blood must be poured into the chalice costing 3 FT, the chalice being sealed with wax afterward. The wearer may not recover the FT until the amulet is used. When the seal is broken, requiring a Free Act, the wearer' is cured of three points of damage per Pulse for 3 Pulses.
This amulet may only be filled at dusk on a Saturday.
12,000sp
Blood Amulet of the Thorn
This amulet is made from a lancet of whitethorn 3 inches long and weighing 2 oz. It must be driven into the flesh inside the right collarbone, between the shoulder and the neck.
If the wearer receives a Specific Grievous Injury to the right shoulder, then they must Break 100 + 40 to avoid the destroying the charm.
A little of the wearer's blood must be poured into the phial costing three points of FT, which the wearer may not recover until the amulet is used. This will reduce the wearer's maximum FT value by three. The wearer may not recover the FT until the amulet is used. When the thorn is drawn out, requiring a Free Act, the wearer' MA is increased by 9 for the next 3 Pulses.
This amulet may only be filled at midnight on a night of the full moon.
12,000sp
Blood Amulet of Seiðr
This amulet is made from holly berries preserved in pine resin in a rosette 3 inches across. It must be worn above the heart.
If the wearer receives a Specific Grievous Injury to the heart or chest, then they must Break 100 + 40 to avoid the charm's destruction.
A little of the wearer's blood must be poured onto the resin changing the colour of the berries to scarlet and reducing the wearer's FT value by three. The wearer may not recover this FT until the amulet is used. When the berries are squeezed as a part of a Cast Action, the rank of the spell is increased by three.
This amulet may only be recharged at the setting of the sun.
12,000sp
Blood Amulet of the Shield
This amulet is made from turquoise shaped into a phial 1 inch high. It must be worn on the left arm.
If the wearer receives a Specific Grievous Injury to the left arm or hand, then they must Break 100 + 40 to avoid the destroying the charm.
A little of the wearer's blood must be poured into phial and sealed with wax. This will reduce the wearer's maximum FT value by three. The wearer may not recover until the amulet is used. As a Reflex Action, the wearer may increase their Protection by 12 A Reflex Action does not count as an Action or Free Act, however, only 1 Reflex Action is allowed per Pulse, so any others that the bearer may have become inaccessible until the next Pulse.
This amulet may only be recharged at the setting of the sun on the last day of the Full Moon.
12,000sp
Blood Amulet of the Crimson Oak
This amulet is made of a splinter of oak and must be attached to the wearer's primary forearm with a bronze pin. If the wearer receives a Specific Grievous Injury to that arm or hand, then they must Break 100 + 20 to avoid the charm being destroyed.
Three drops of blood (costing 3 FT) must be spilt onto the oak staining it crimson. This FT may not be recovered until after the charm has been used. As a part of an attack with a weapon in their primary hand, the wearer may increase either:
- the Strike Chance of that weapon by 30
- or
- the damage inflicted with that weapon by 6
This amulet may only recharged at noon. 12,000sp
Blood Amulet of Desperate Hope
This amulet is made of 1 half inch bead of jade cut into the shape of a lotus which must be woven into the wearer's beard or hair to be effective. If the wearer receives a Specific Grievous Injury to the head, then they must Break 100 + 40 to avoid the charm being destroyed.
Two drops of blood (costing 2 FT) must be spilt onto the lotus staining it crimson. This FT may not be recovered until after the charm has been used.
As a Free Act, the amulet may be used to increase the wearer's Defence and Magical Resistance by 15 versus Horrors or their constructs for 2 Pulses.
This amulet may only be recharged at dawn.
15,000sp
Second Chance Amulet
This amulet is made from glass shaped into a phial 1 inch high. It must be worn over the heart.
If the wearer receives a Specific Grievous Injury to the chest, then they must Break 100 + 40 to avoid the destroying the charm.
A little of the wearer's blood must be poured into phial and sealed with wax. This will reduce the wearer's maximum FT value by one. The wearer may not recover this FT until after the amulet is used. In the event that the wearer's health is reduced to the point where they would die, 1 rollup D10 check is made and applied as healing. This will destroy the amulet
300sp
Tondracis a spokesman for the mercenaries in town. He is an 8ft tall hobgoblin, seems weasely and slenderer than his height would suggest. His plane of origin is Parvuli.
Wares from Tondrac
Green Glass Sabre
This glass sabre has been enchanted to be as durable as steel, and weighs 2lbs. It requires PS 12 and MD 15 to wield, has a base Strike Chance of 61%, and inflicts 1 rollup D10 + 5. It inflicts an additional rollup D10 versus plants or plant-based creatures.
Red Glass Sabre
This glass sabre has been enchanted to be as durable as steel, and weighs 2lbs. It requires PS 12 and MD 15 to wield, has a base Strike Chance of 61%, and inflicts 1 rollup D10 + 5. It inflicts an additional rollup D10 versus fiery or fire-based creatures.
Obsidian & Pepperwood Macuahuitl
This weapon is made from a length of fire-hardened wood into which has been embedded 13 obsidian teeth. It is treated as a broadsword, requires PS 13 and MD 15 to wield. It has a base Strike Chance of 67% and inflicts 2 rollup D10. Any attempt to over-strength the macuahuitl will damage one of the teeth. When all of the teeth are broken, the wooden spine and hilt will crumble to a pale brown dust.
Hardened Silk Armour
This armour will fit a person of size 6. It is made from lozenges of dark blue and black silk, quilted and hardened in some fashion. It provides Protection 6, Spell Armour 4 and Damage Reduction 3. It weighs 1 lb, provides no penalty to AG and improves Stealth by 10.
Brass & Pearl Astralabe
This brass sphere is bound inside two silver rings, a brass arrow emerging from its north pole. To activate the device, the wielder expends a point of MA through the device, and for the next hour, it will attempt to detect the most corrupted Astral space in range. If on the Material plane, the range is 10 miles times the user's remaining MA and is automatically successful unless no corrupted Astral space is within range. If on the Astral plane, the range is limited only to the world's the user knows, but the user must roll under 1 x remaining MA.
MA spent in this way is recovered at a rate of 1 per 3 days, so long as they spend no more than half their FT.
- a gnome jewelcrafter / binder who specialises in microfauna animates amongst other things
Wares from the Jewelcrafter
Feathered Serpent
This metre long snake is made from orichalcum with feathers crafted from glass in shades of blue or green and weighs 22 oz. It will wind decoratively around a walking stick, staff or haft of a pole weapon. When it is animate, it has the following characteristics:
- Abilities
- The serpent may crawl, fly (to a ceiling of Rank metres) and deliver an electrical attack as outlined below. It is an animate, and is never affected by Specific Grievous injuries or magic that targets the personality (Charm, Fear, Compelling Obedience, etc).
- Movement Rates
- Running / Climbing / Flying: 200/100/150 + 25 yards per minute per Rank in Animating Objects
| PS: | 3 | MD: | None | AG: | 22 | MA: | None | EN: | 2 | FT: | 4 |
|---|---|---|---|---|---|---|---|---|---|---|---|
| WP: | 18 | PC: | 17 | PB: | 10 | TMR: | 4/2/3* | NA: | Feathers reduce damage by 3 | ||
- Weapons
- Arc: Auto, 1 rollup D10 + 1 / 2 Ranks, MC, Electrical damage, Range: 5 feet + 1 foot per Rank
- Bite: BC 40%, [1 rollup D10], Close, Rank =1 per 2 Ranks.
PS, AG, WP, EN, FT & PC values increase at a rate of 1 for every 5 Ranks. PB increases at 1 for every 2 Ranks. The Arc attack costs 2 FT.
* Flying TMR increases at 1 for every 2 Ranks in Animating Objects.
14,000sp
Bronze Scorpion
This bronze casting of a scorpion weighs 3 lbs and is a legal target for the Animating Objects spell.
When it is thus animated, it will have a movement rate of 250 yards per minute on the ground.
It is hollow, and its abdomen contains a reservoir into which blade venom may be poured.
| PS: | 6 | MD: | 15 | AG: | 18 | MA: | None | EN: | 15 | FT: | 18 |
|---|---|---|---|---|---|---|---|---|---|---|---|
| WP: | 15 | PC: | 11 | PB: | 4 | TMR: | 5 | NA: | Bronze body reduces damage by 6 | ||
*Note that the natural armour is solid bronze and therefore reduces all damage by 6.
- Weapons
- Sting: BC 25%, [1 rollup D + 1 / 2 Ranks] , A Class damage, Close, Rank =1 per 2 Ranks.
- Pincer BC 35% [1 rollup D10], -, Close, Rank = 1 per 2 Ranks
It may deliver 2 Pincer and 1 Sting attack without penalty.
Poison damage occurs when the sting inflicts damage, and is determined by the blade venom poured into the reservoir.
8,000sp
Buffs & Mil Sci
Long Term (assumed always on)
| Magic (caster) | Rk | Effects | Dur | Bo | Ma | Th | Ts | Da | ?? |
|---|---|---|---|---|---|---|---|---|---|
| Strength of Stone (Ts) | 10 | y | y | y | y | y | |||
| Fire Armour (Ts) | 11 | 48 pts of Fire Protection (ablative) | 11 Hours | Y | Y | Y | Y | ||
| Fireproofing (Ts) | 6 | 7 Hrs | Y | Y | Y | Y | |||
| Modify Aura (T) | 6 | +/- 3 Levels | 7 hrs | ||||||
| Instil Flight (T) Self | 10 | 40mph 650 lbs limit | 5.5 hrs | - | - | Y | - | - | - |
| Linking Lifeforce (T) | 14 | Reflect health within 1500 miles | Perm | Th | Th | Bo | Th |
Short Term
| Magic (caster) | Rk | Effects | Dur | Bo | Ma | Th | Ts | Da | ?? |
|---|---|---|---|---|---|---|---|---|---|
Spell Racks
Standard contents of spell racks:
- Boris
- 2 Matrices
- Wraithform - Damage Reduction
- Life Draining - Lich Field
- Incantations are cast before breakfast, then these are racked:
- Spectral Warrior - Pale Horse
- Spectral Warrior - Spectral Tract
- Wraithform - Damage Reduction will be re-racked and cast again before dinner.
Watch Order
| 1 | 2 | 3 | 4 | 5 | 6 | 7 | 8 | 9 | 10 | 11 | 12 |
|---|---|---|---|---|---|---|---|---|---|---|---|
| ??? | ??? | ??? | ??? | ||||||||
| ??? | ??? | ??? | |||||||||
Marching Order
| Skirmish Formations (Front) | ||
|---|---|---|
| Default
??? ??? |
Double File
??? ??? |
Single File
??? |
Plans
Purchased items/goods from Seagate.
Party funds (to be deducted from the sp value at the end of the game;
- from Naden (by way of AB-V).
- 5 potions of reason restored @ 6,500sp - 32,500sp. 1 used by Boris in mummy fight
Tsayoi personal funds
- 3 Dragonsmite Investeds (rank 11, D+43, BC99) from Flamis 12,000 sp
- 3 Waters of Strength from Father Rowan (0sp)
- 3 Waters of Strength from Prue (0sp) - 2 used
- 3 Waters of Healing from Prue (0sp) - 1 used
- 3 Waters of Dexterity from Prue (0sp)
- 2 Potions of Protection from Naden (by way of AB-V) @ 6000sp ea - 12,000 sp - 1 used vs MF's, another vs X
- 2 Potions of Mind Cloak from Naden (by way of AB-V) @ 6250sp ea - 12,500 sp - 1 used
- 5 Restoratives (Rank 10 +24FT/-12EN) from Naden (by way of AB-V) @ 750sp ea - 3750sp - 3 used
- 5 Scrolls of Trollskin from Basilic @ 1800sp ea - 9,000sp
- 1 Amulet of Jasper from Sooty - 16,000sp
Total 65,250sp - before even leaving the guild!
Mario personal funds
- 1 Circle of Protection potion (rank 20) from ABV 6,000 sp
- 2 Waters of Strength from Prue (0sp)
- 5 Waters of Healing from Prue (0sp)
- 1 Waters of Dexterity from Prue (0sp)
- 5 Restoratives (Rank 10 +24FT/-12EN) from Naden (by way of AB-V) @ 750sp ea - 3750sp
- 1 Rk 20 Greater all areas from Rahne 14,000
- 1 Amulet of Jasper from Sooty - 16,000sp
Thaeuss personal funds
- 1 Amulet of Jasper from Sooty - 16,000sp
Boris personal funds
TBA
Purchased in Lower Ocelotopec.
- A potion of Astral Sight - to mario for use
- A silver death grenado - free to test and report back. Used and reported back.
- We discover that the Blue liquid vials are 12 spots - very valuable.
Awards
Boris' Award
Mario's Award
Ophelia's Award
Thaeuss' Award
Tsayoi's Award
Experience
Treasure
Note; the Black Opal from the star gods room can store 6 Star points (due to value between 6-7,000sp
Jim: a list of random stuff.
- itemised gold throne
- Heavy Brocaded Robes inc gems
- Blackrod's heart
From Blackrod's / His Incubus - glaive, dagger, tail, black vial, heart, staff,
- A number of darkness shedding torches
- 6 stone garmek scales
- Jackals on the edge of twilight (210)? if we go back to get these. Ophelia
- From 2 early deceivers - silkie robes, satin tuner, needles&scaples, codex of , 2 rings (ring lored), 1 eye, 2 staunch potions of healing, 2 flesh pots, rubes on/in a shirt, head of a unicorn.
- from 4 deceivers - environmental suits, enhanced exoskeltons
- From Fleeing deceiver: Potion from the escaping deceiver, Remote trigger for a trap
- From Buwalagatha: Eyes, Claws, head, carapace to make a huge breastplate or shields (BP would add +5AP to a max of 12, as shields could make 2 kite shields that would act as tower shields with one being left handed and the other right handed - MD-3 and weight10lbs) ?, 14 potions, dice investeds, 15 madness and 15 hunt points. Ring of Gifts w 3 major wishes and a finger curse associated with each wish.
- From Starlight grove: Golden Mistletoe cutting for later planting at home
- From temple: Magical trap tile - wall of stone and earth tremor.
- 42 lbs of fermit
- immolation berries, flamecap mushrooms and other cuttings such as golden mistletoe etc have been left in the fermit lined cave of the worm - for future harvesting. ANY OTHER SEEDS OR SUCHLIKE TO BE LEFT THERE?
- Flying saucer
- worm bones of elemental bronze
- Sword Hand 1/2 treated as steel - can be weaponsmithed
- wolf blood potion
- crystal pieces that can be melted down into amorphous metal
Individual Awards:
Calendar
| Winter: Frost 817 (7) | ||||||||||||||
|---|---|---|---|---|---|---|---|---|---|---|---|---|---|---|
| Moonday | Duesday | W'ansday | Th'rsday | Frysday | Reapsday | Sunday | ||||||||
| Samhain No tribute day |
1 | Guild Meeting Seagate, Blackshore | 2 | Astral Travel D1 | 3 | Astral Travel D2 | 4 | Astral Travel D3 | 5 | Astral Travel D4 | 6 | Astral Travel D5 | ||
| 7 | Astral Travel D6 | 8 | Astral Travel D7 | 9 | Astral Travel D8 | 10 | Astral Travel D9 | 11 | Astral Travel D10 | 12 | Astral Travel D11 | 13 | Astral Travel D12 | |
| 14 | Astral Travel D13 | 15 | Astral Travel D14. Arrive Trondheim and get equipped | 16 | Ignore travel across to target location and sleep there | 17 | Day travelling SW down coast 400m | 18 | Day travelling WSW down towards target area over the Sierra Madre. Arrive at location. Investigate. Encounter Wormskulls. | 19 | Fight Blackrod, go into the Catacombs and then out | 20 | The adoratorium and checking out southern reaches. MF Fight. Meet 'Daisy' | |
| 21 | Back into the Ruins. Bat cave battle. 'Committee' battle. Flee Queenie and Slaad. Fight Blackrod on route and kill him. Rtn to heal. Rtn up the hill in late afternoon - encounter B-rod. Rtn to heal. stay night. | 22 | Afternoon sees us return to the ruins. We fight many foes inc the Deceivers, Bulgwatha and the worm where we get the bat mask. We return to lower Ocelotopec late afternoon. | 23 | Remain in Lower Ocelotopec for R&R and itemry work. | 24 | Remain in Lower Ocelotopec for R&R and itemry work. | 25 | Remain in Lower Ocelotopec for R&R and itemry work. | 26 | Remain in Lower Ocelotopec for R&R and itemry work. | 27 | Remain in Lower Ocelotopec for R&R and itemry work. | |
| 28 | Depart and travel via Astral to Bishops | 29 | D1 Depart Bishops to travel Home | 30 | D2 Depart Bishops to travel Home | 1 | D3 Depart Bishops to travel Home | 2 | D4 Depart Bishops to travel Home | 3 | D5 Depart Bishops to travel Home | 4 | D6 Depart Bishops to travel Home | |
| Winter: Snow 817 (8) | ||||||||||||||
| 5 | D7 Depart Bishops to travel Home | 6 | D8 Depart Bishops to travel Home | 7 | D9 Depart Bishops to travel Home | 8 | D10 Depart Bishops to travel Home | 9 | D11 Depart Bishops to travel Home | 10 | D12 Depart Bishops to travel Home | 11 | D13 Depart Bishops to travel Home. Arrive back in seagate | |
| 12 | 13 | 14 | 15 | Solstice | 16 | 17 | 18 | Toxocatl | ||||||
| 19 | Days of Chaos | 20 | 21 | 22 | 23 | 24 | 25 | |||||||
| 26 | 27 | 28 | 29 | 30 | Twelfth Night | 1 | 2 | |||||||
| Winter: Ice 817 (9) | ||||||||||||||
| 3 | 4 | 5 | 6 | First Plough | 7 | 8 | 9 | |||||||
| 10 | 11 | 12 | 13 | 14 | 15 | 16 | ||||||||
| 17 | 18 | 19 | 20 | 21 | 22 | 23 | ||||||||
| 24 | 25 | 26 | 27 | 28 | 29 | 30 | ||||||||